
Ian Tweedie
Monday, February 17, 2025 | 11 minutes
Set folder permissions in SharePoint with Power Automate Flow
Introduction
Want to grand and remove item or folder permissions in SharePoint using Power Automate with a Service Principle but can’t do it? Not able to do it with the out of the box SharePoint Connector?
Tired of dealing with Conditional Access Policies, password expirations, and frequent logins?
Good news! In this guide, I’ll show you how to set these using an App Registration. No service accounts, no password headaches. I’ll also share a Custom Connector to make it even easier, plus step-by-step instructions to:
- Create and configure the App Registration
- Assign API permissions
- Setting permissions using sites.selected
- Use Power Automate with the custom connector
Whats the problem
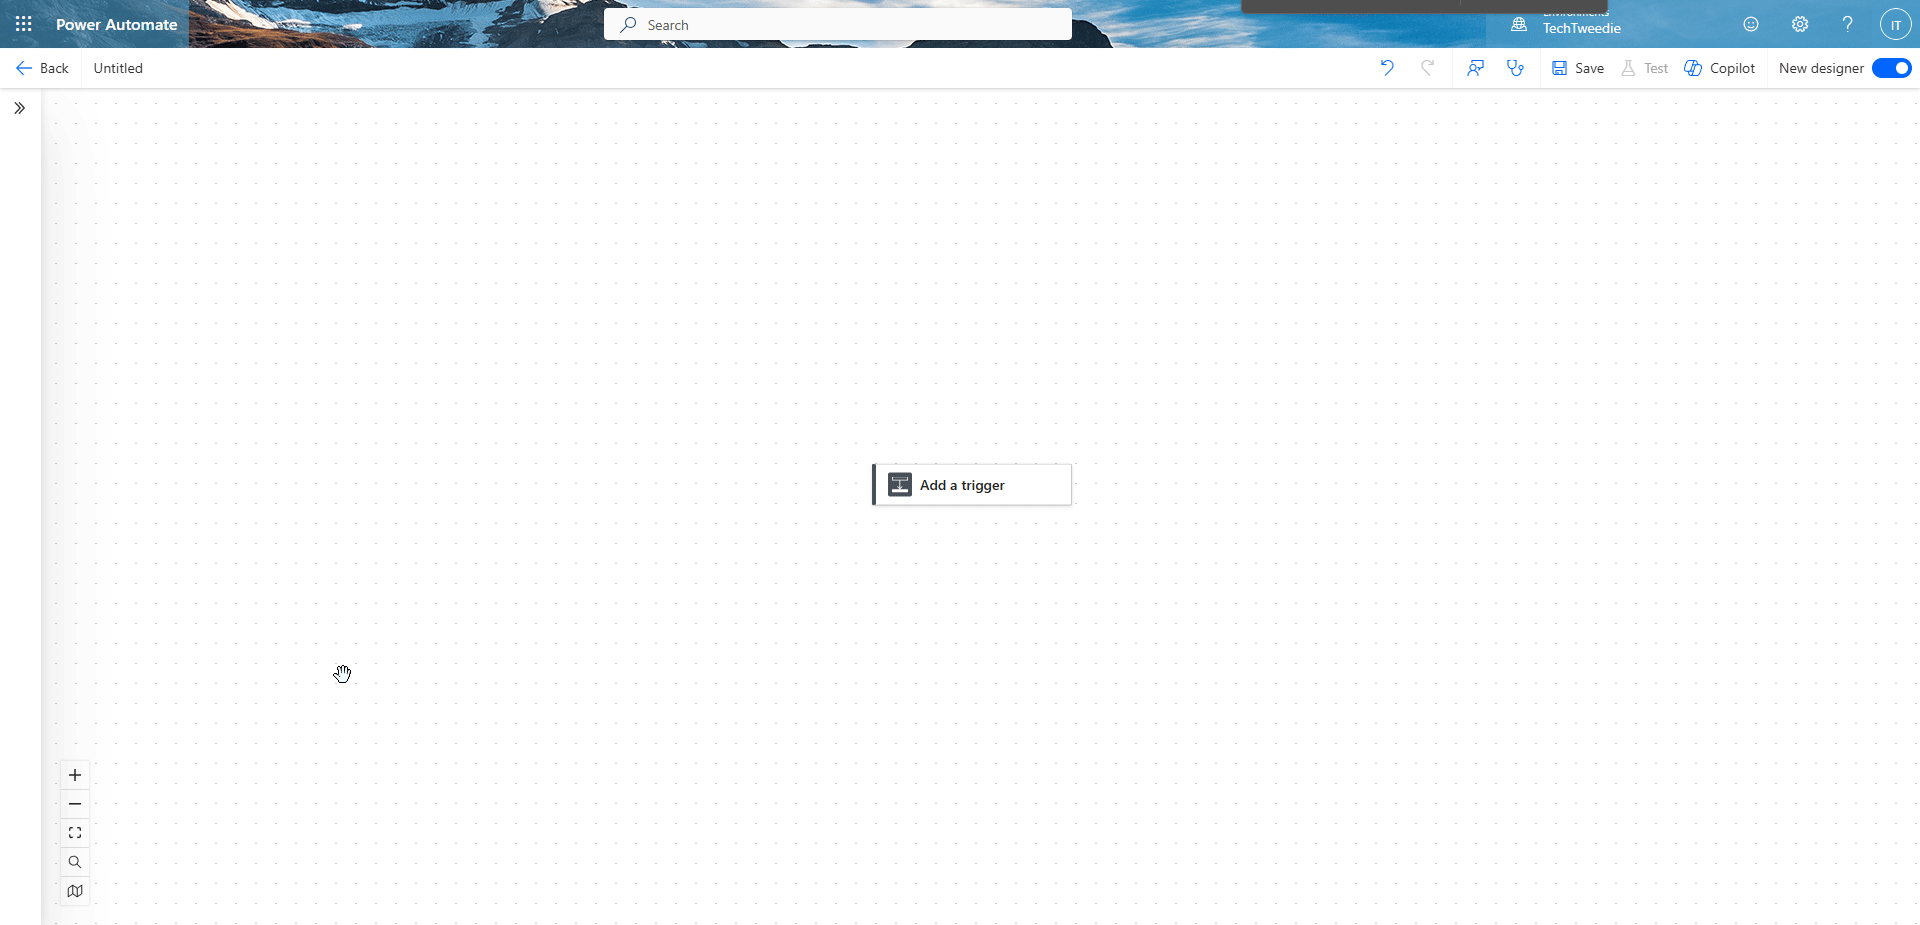
Let’s have a look at the problem we are trying to solve. We are going to go into Power Automate Flow and see if we can edit, add, or remove a SharePoint Permission using the Standard SharePoint Connector.
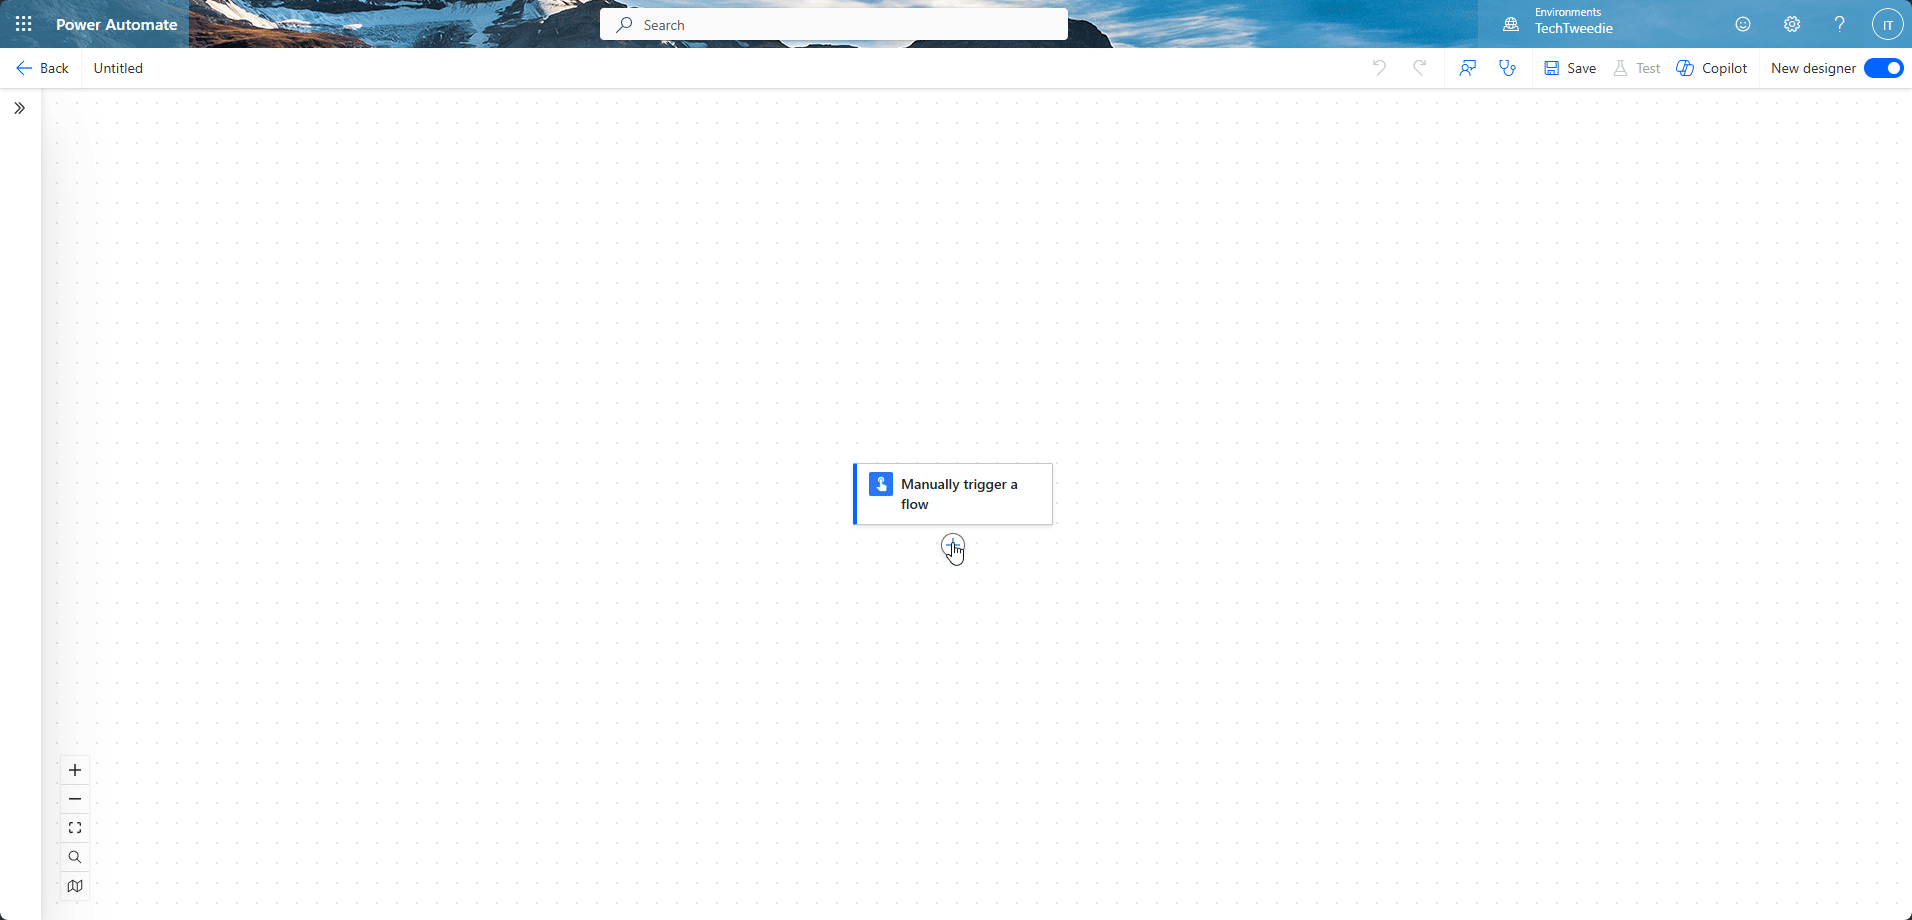
As we can see it is not possible.
To solve this problem I am going to share with you a connector I have written and released that is free to use, and show you how to set it up and use it.
Create the App Registration
For this section you will need the help of a Global Administrator
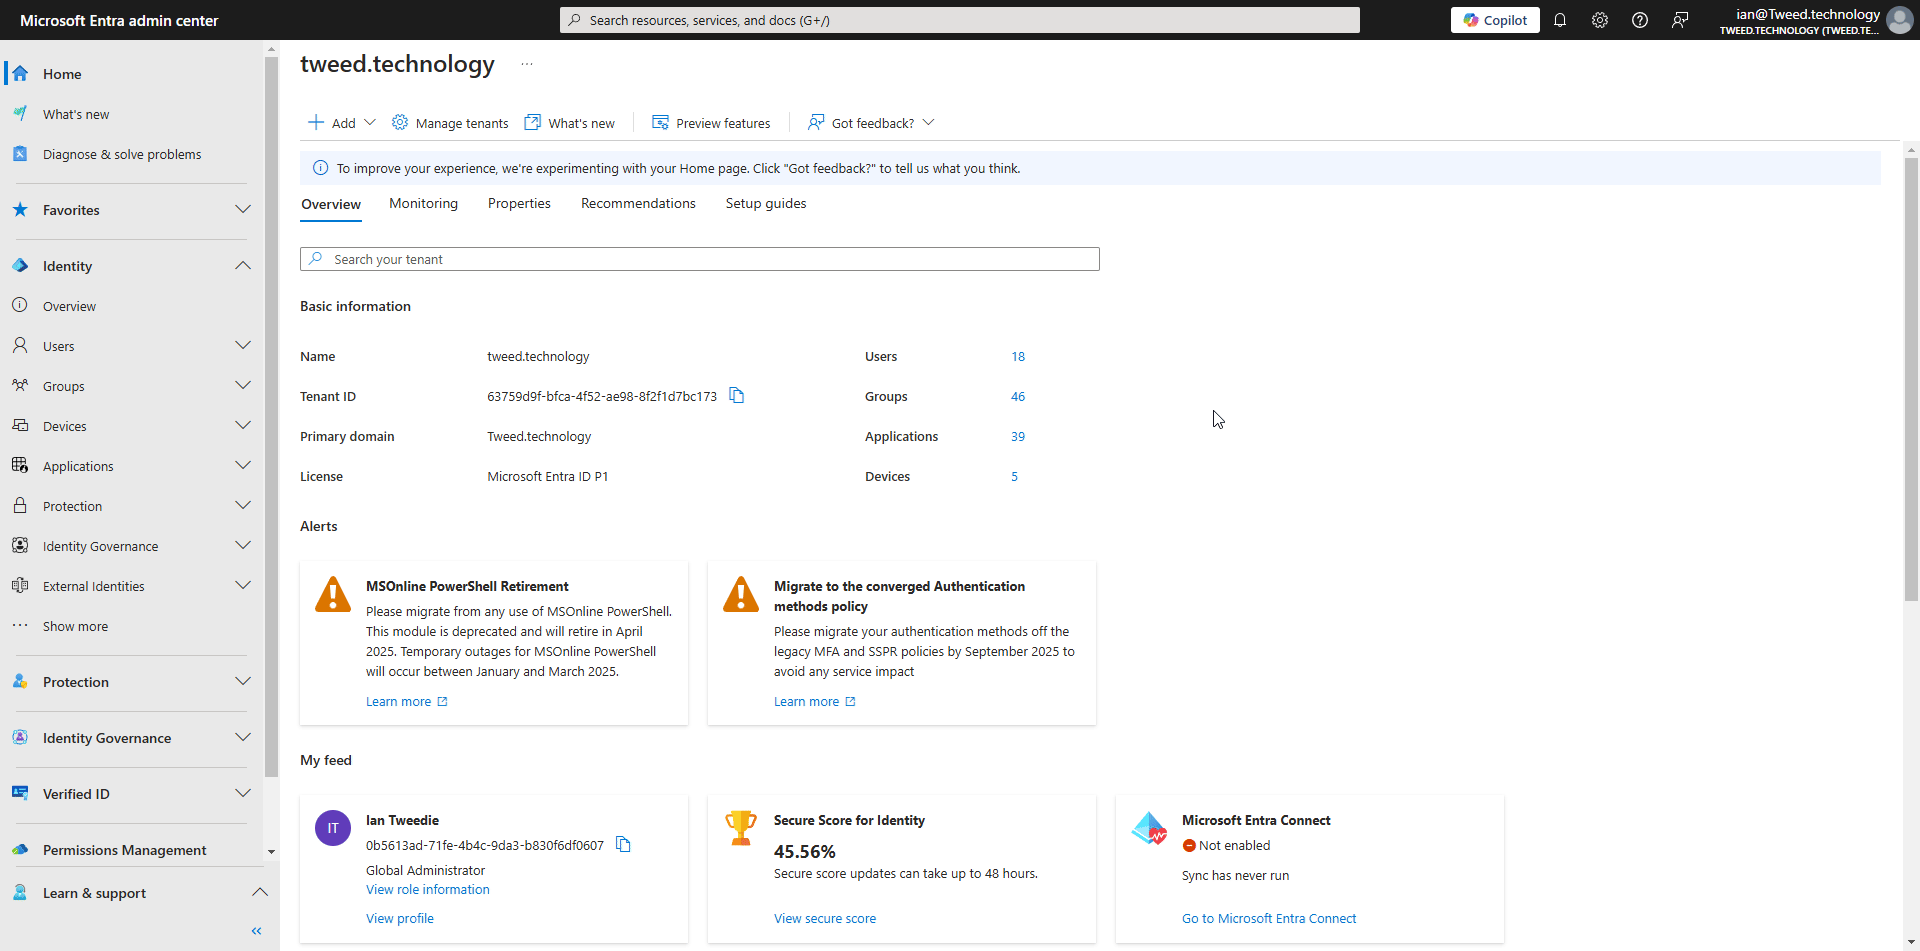
Step 1 - Log in to Entra
By default most users will have the ability to go to https://entra.microsoft.com and log in with your user account.
Step 2 - Create the app registration
Next we are going to create an application registration so our Power Automate flow can talk directly to SharePoint Online.
- When you are on the Entra Overview page, open up Identity.
- Then navigate to Applications in the left hand menu and then open up App Registrations.
- From there select New Registration.
- A new screen will open, give your new app registration a name and then click next.
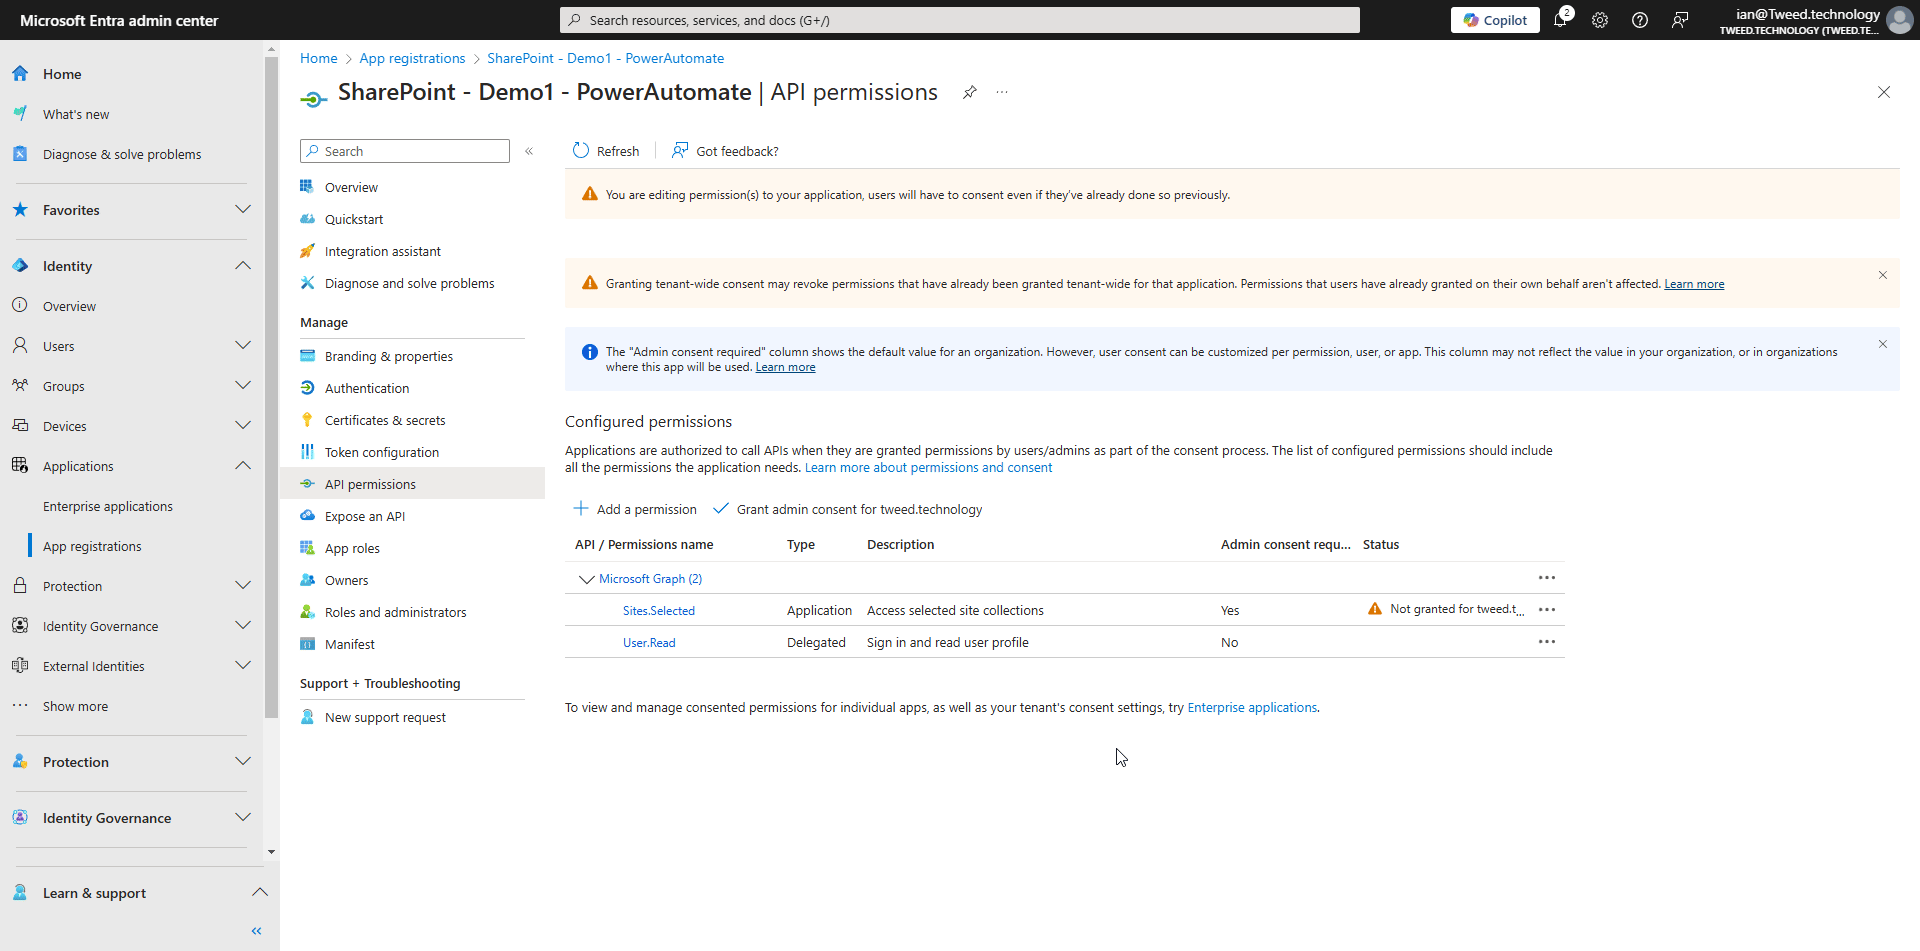
Step 3 - Add API permission
We then need to give our App Registration an API Permission, This will be the permission used to talk to Exchange Online.
- In the left hand menu click on API Permission.
- Click on Add permission.
- A window will then open, select Application Permission.
- Then using the search box type in
sites.selected. - The list will then filter, as it does open up the Mail option and select
sites.selected.
Step 4 - Grant Admin consent
If the Grant admin consent is grayed out then this is because we lack administrative roles for our account. For this next step you will need a some help from a Global Admin.
Ask a Global administrator to grant admin consent for you if you cant do it.
Setting your application permissions in SharePoint Online
Our next step is to set what permissions the application has within SharePoint. This is different to Exchange where you are limiting the default permission, with sites.selected we have to explicitly give permission rather than specifically limiting it.
This Stage will need to be done by someone who is an Owner of the SharePoint site using Microsoft Graph.
Further reading: Further information on the API call can be found here.
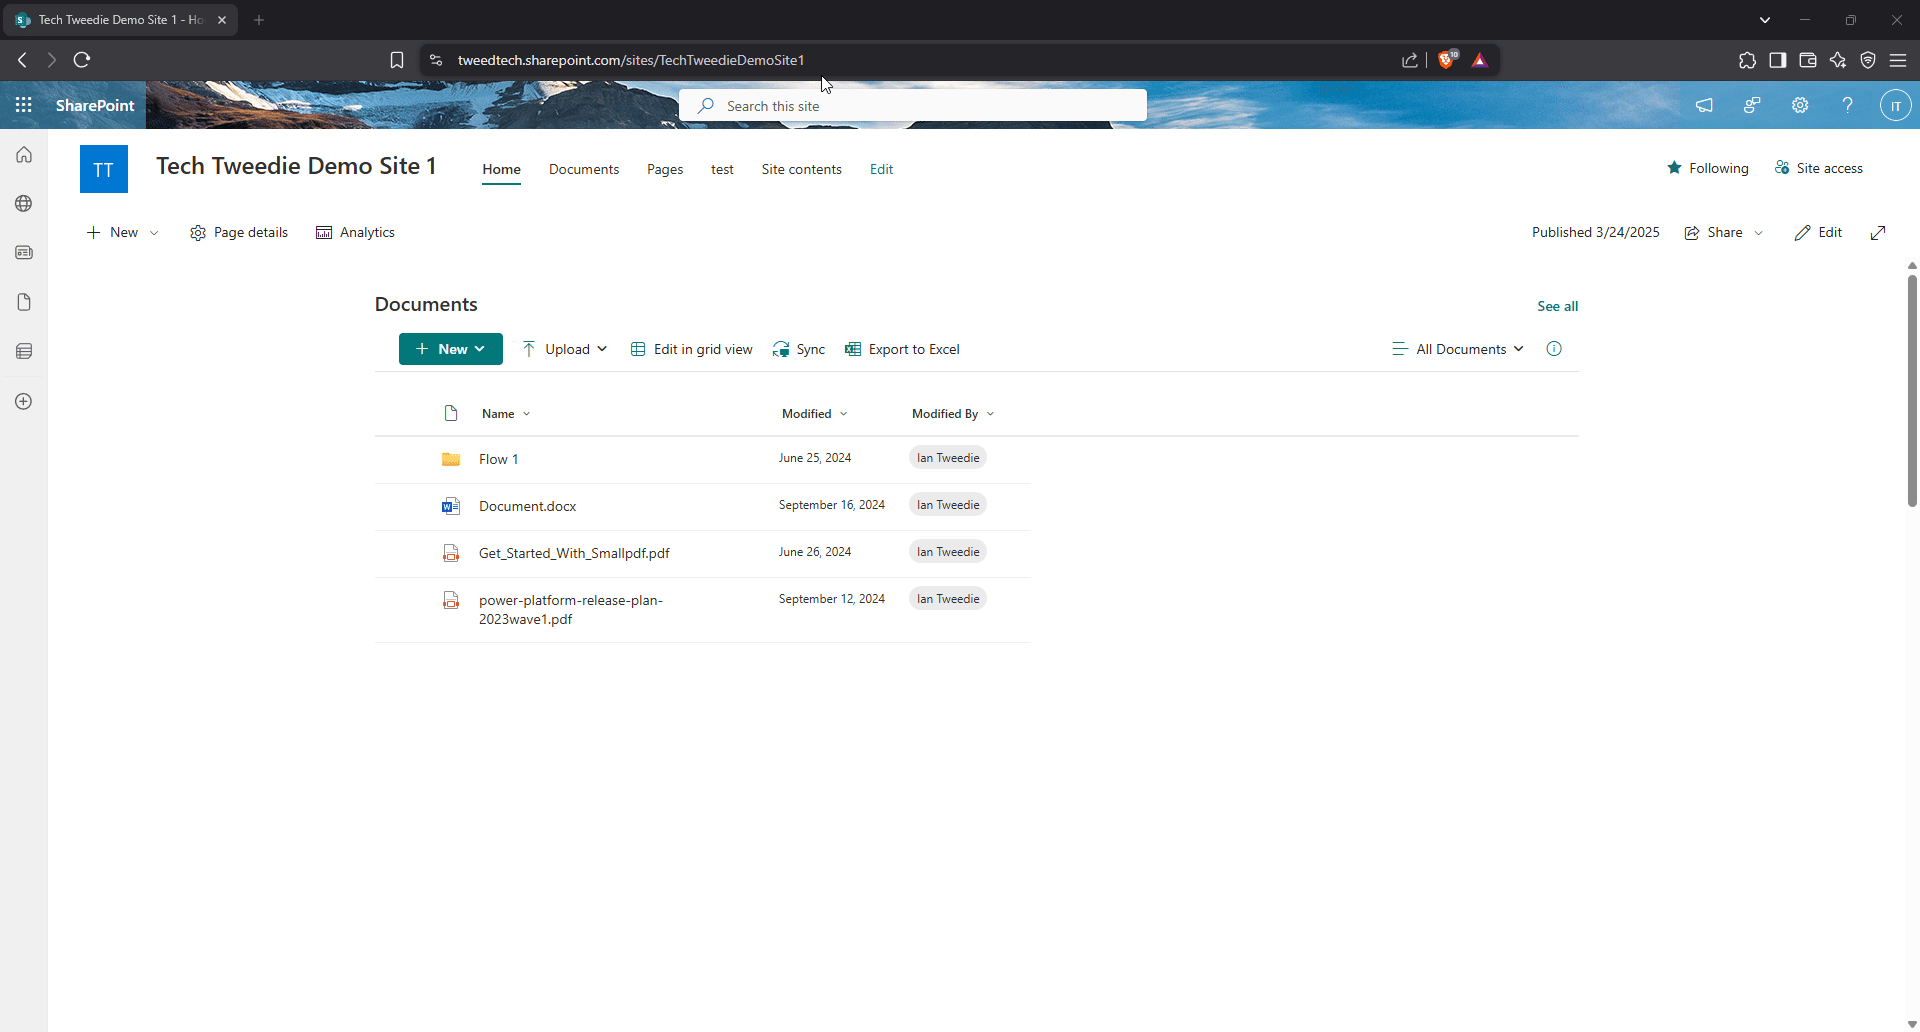
Step 1 - Get SharePoint Site ID
Navigate to your SharePoint Site, e.g. https://tweedtech.sharepoint.com/sites/TechTweedieDemoSite1 and then just add /_api/site?$select=Id on the end.
For example this would give you the URL https://tweedtech.sharepoint.com/sites/TechTweedieDemoSite1/_api/site?$select=Id.
You will get XML back that looks like this
<?xml version="1.0" encoding="utf-8"?>
<entry xml:base="https://tweedtech.sharepoint.com/sites/TechTweedieDemoSite1/_api/" xmlns="http://www.w3.org/2005/Atom" xmlns:d="http://schemas.microsoft.com/ado/2007/08/dataservices" xmlns:m="http://schemas.microsoft.com/ado/2007/08/dataservices/metadata" xmlns:georss="http://www.georss.org/georss" xmlns:gml="http://www.opengis.net/gml">
   <id>https://tweedtech.sharepoint.com/sites/TechTweedieDemoSite1/_api/site</id>
   <category term="SP.Site" scheme="http://schemas.microsoft.com/ado/2007/08/dataservices/scheme" />
   <link rel="edit" href="site" />
   <title />
   <updated>2025-02-13T21:53:24Z</updated>
   <author>
       <name />
   </author>
   <content type="application/xml">
       <m:properties>
           <d:Id m:type="Edm.Guid">9ce4e8e2-fa87-474b-bd2f-d858d828f8a1</d:Id>
       </m:properties>
   </content>
</entry>
Locate the ID value, it will look something like this from within the xml
<d:Id m:type="Edm.Guid">9ce4e8e2-fa87-474b-bd2f-d858d828f8a1</d:Id>
We need the Site ID value which in this example is 9ce4e8e2-fa87-474b-bd2f-d858d828f8a1
Step 2 - Give Permission to our App Registration for this site
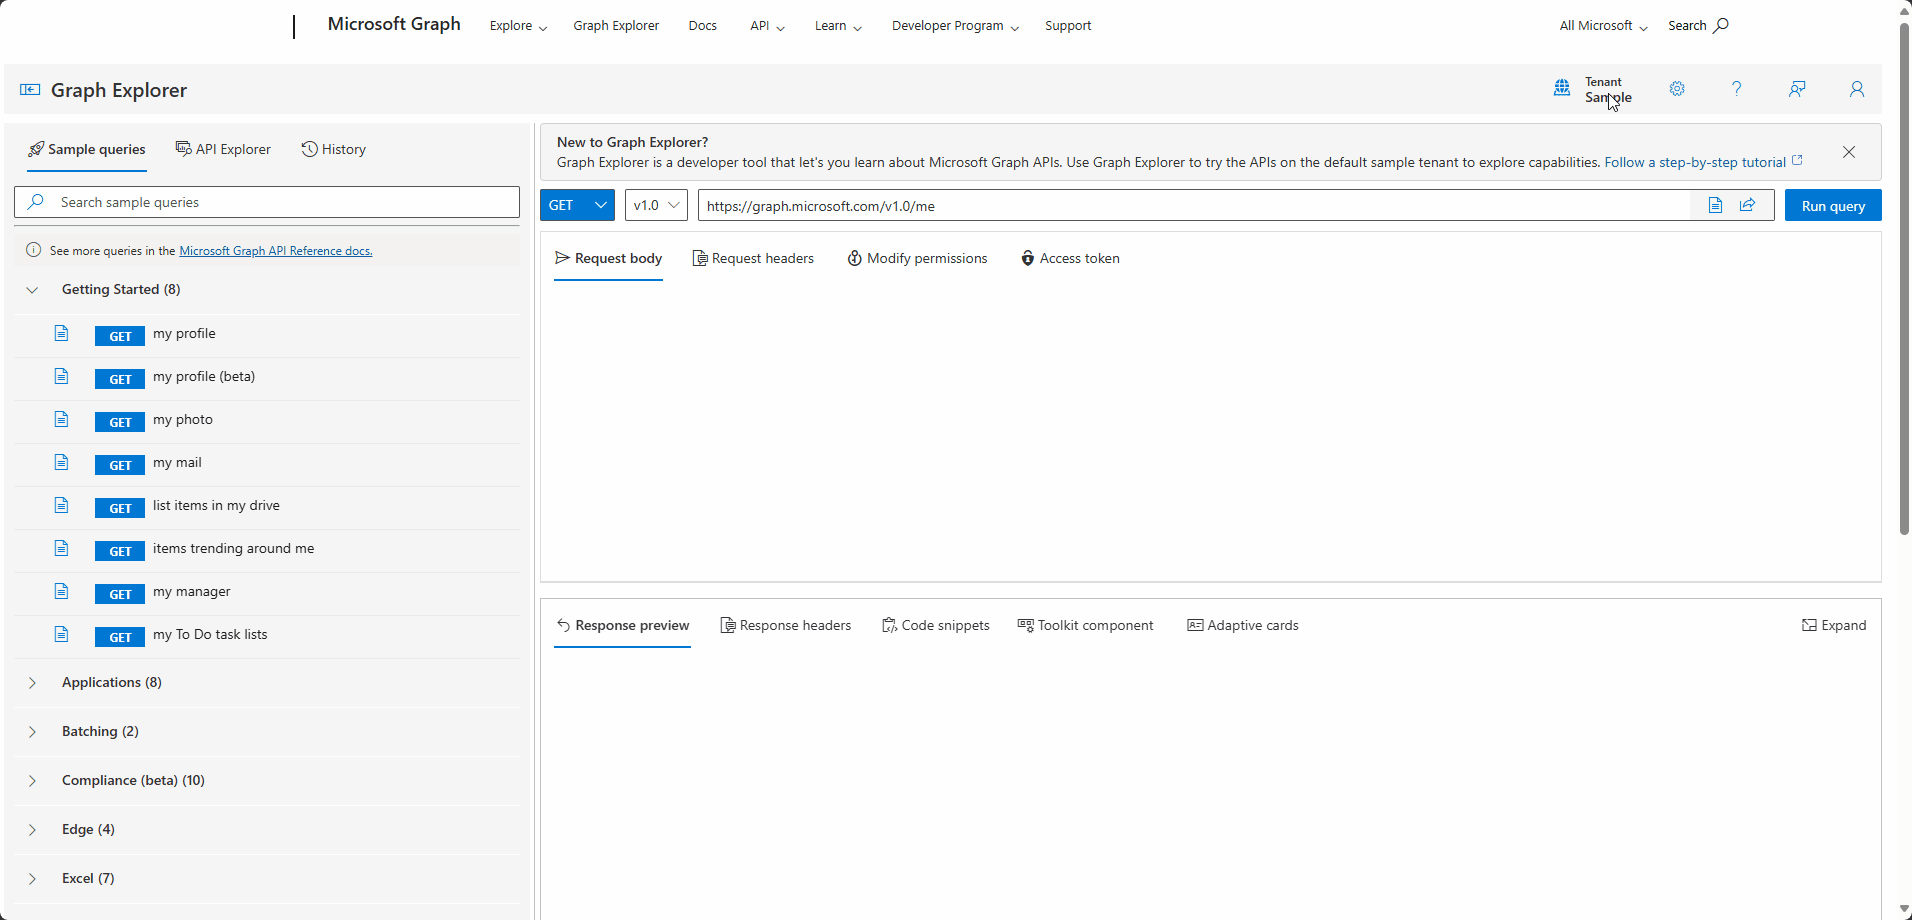
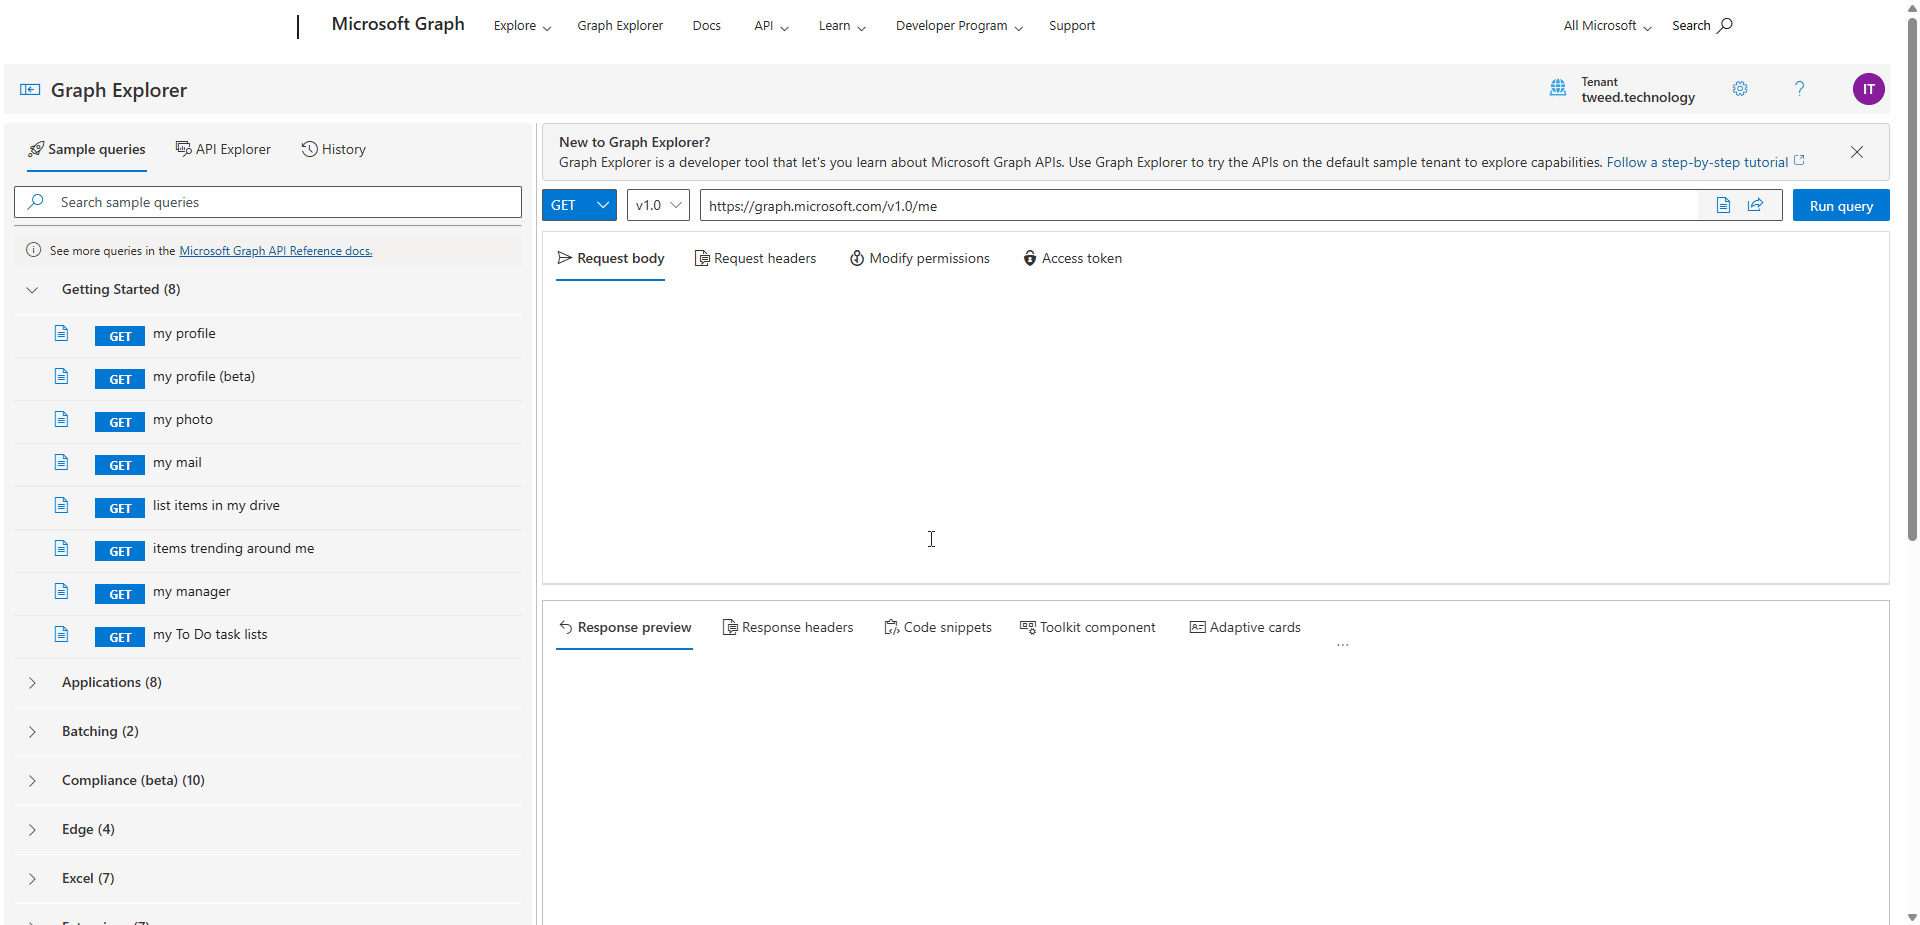
The first stage is to give the permission to our app permissions on the SharePoint site, to do this we need to use Graph Explorer. You will also need to be an Owner of the SharePoint Site you are giving permissions to.
Step 1 - Access MS Graph Explorer
- Go to https://developer.microsoft.com/en-us/graph/graph-explorer
- Sign in to your account.
- Make sure the Tenant shows your tenant or company name.
- Then Press Run query to make sure you are connected.
Step 2 - Set permissions
The next stage is to run the Create permission command for the app registration to give tit the necessary permissions to be able to set permissions for files and folders.
To do this we need to;
Change the method to
POST.Enter in the following address
https://graph.microsoft.com/v1.0/sites/{sitesId}/permissions, replacing the{siteID}with your siteID. e.g.https://graph.microsoft.com/v1.0/sites/9ce4e8e2-fa87-474b-bd2f-d858d828f8a1/permissions.Click on Modify permissions and open the permissions panel.
Search for site, and then open up Sites.
Click on Consent for
Sites.FullControl.All. This will open up a consent screen.Then in Request body enter in the below json replacing
{clientID}and{displayName}with your applications details.{ "roles": ["write"], "grantedToIdentities": [ { "application": { "id": "{clientID}", "displayName": "{displayName}" } } ] }e.g.
{
"roles": ["write"],
"grantedToIdentities": [
  {
    "application": {
      "id": "229df885-246d-4b6f-8280-267e51f9dc65",
      "displayName": "SharePoint - Demo1 - PowerAutomate"
    }
  }
  ]
}
You will then get the response like the below
{
    "@odata.context": "https://graph.microsoft.com/v1.0/$metadata#sites('9ce4e8e2-fa87-474b-bd2f-d858d828f8a1')/permissions/$entity",
    "id": "aTowaS50fG1zLnNwLmV4dHwyMjlkZjg4NS0yNDZkLTRiNmYtODI4MC0yNjdlNTFmOWRjNjVANjM3NTlkOWYtYmZjYS00ZjUyLWFlOTgtOGYyZjFkN2JjMTcz",
    "grantedToIdentitiesV2": [
        {
            "application": {
                "displayName": "SharePoint - Demo1 - PowerAutomate",
                "id": "229df885-246d-4b6f-8280-267e51f9dc65"
            }
        }
    ],
    "grantedToIdentities": [
        {
            "application": {
                "displayName": "SharePoint - Demo1 - PowerAutomate",
                "id": "229df885-246d-4b6f-8280-267e51f9dc65"
            }
        }
    ]
}
Download and testing the connector
Step 1 - Find custom connectors
First we need to find custom connectors in Power Automate.
To do this we need to:
- Navigate to
https://make.powerautomate.com/ - Change our environment should you need to.
- Then in the left hand menu, navigate to More and then Discover all, and then locate Custom connectors.

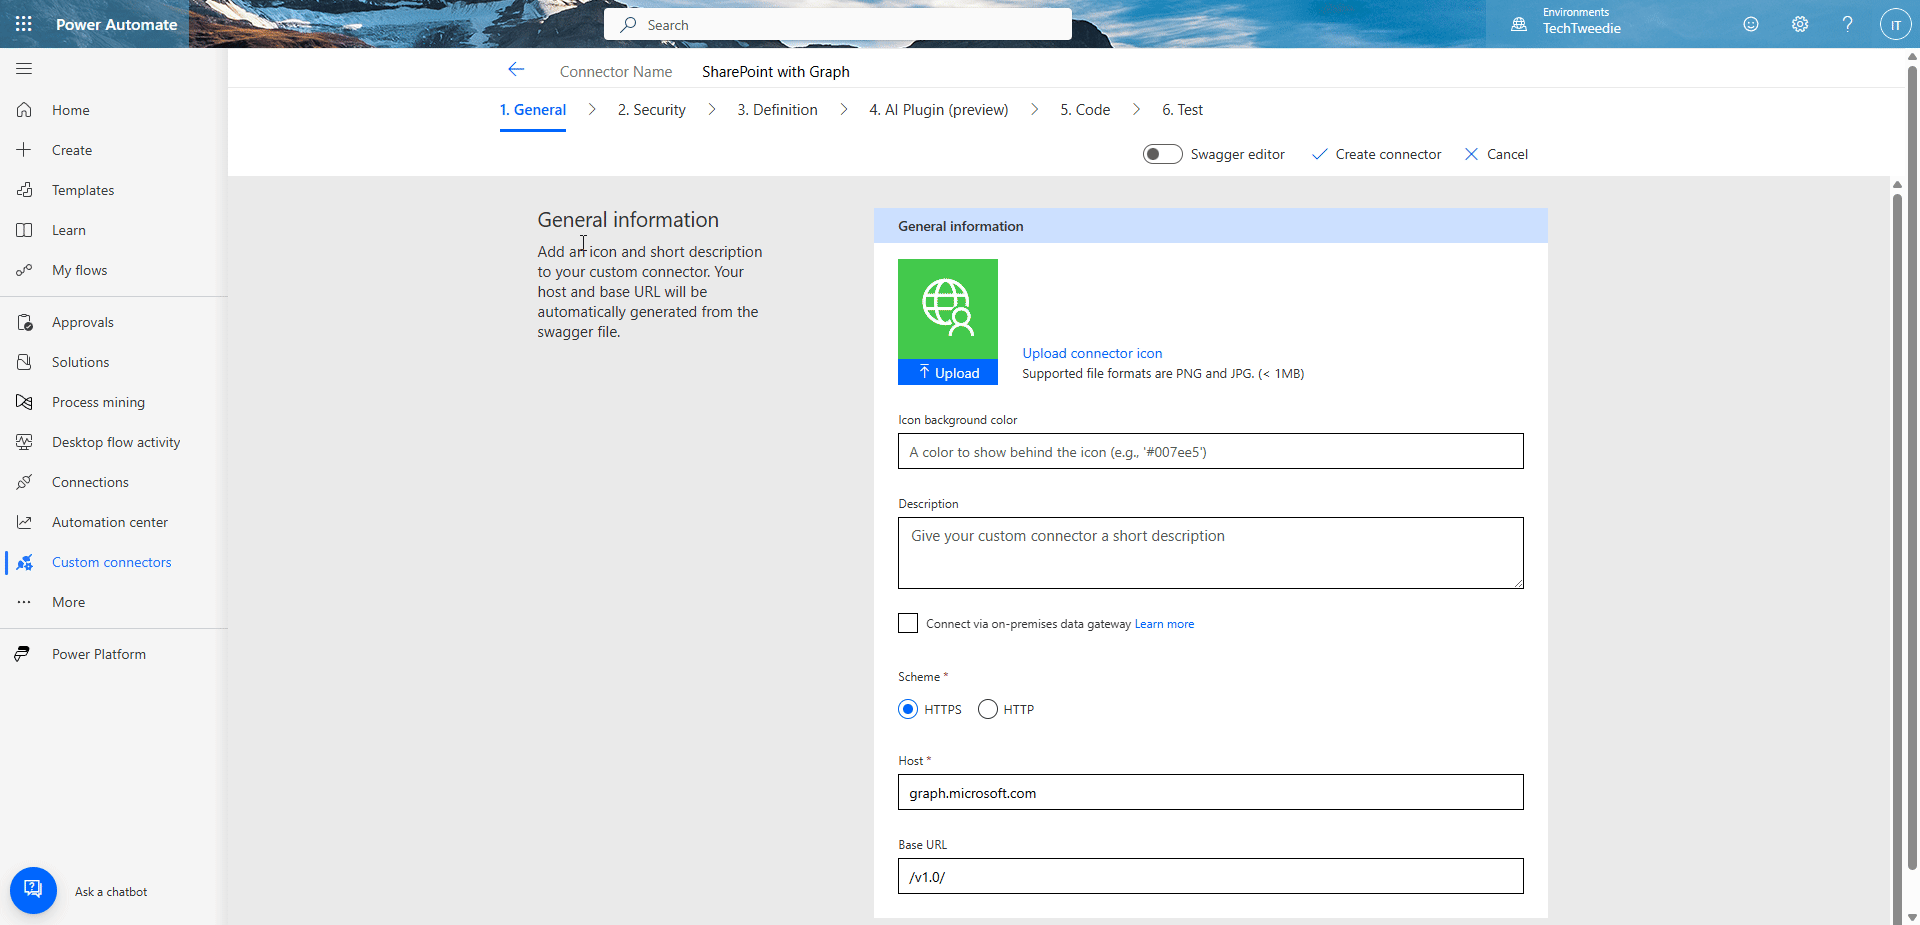
Step 2 - Create a new connector
- Click on New custom connector.
- Then click on Import an OpenAPI from URL.
- Then enter in the connector name
SharePoint with Graph. - Then enter in the URL
https://raw.githubusercontent.com/itweedie/PowerPlatform-PowerAutomate-SharePoint-with-Graph-Connector/refs/heads/main/connector/shared_sharepoint-20with-20graph-5fbb1338f75d4745cb-5f8d99aea54e2a1a34/apiDefinition.swagger.json
Step 3 - Configure your connector
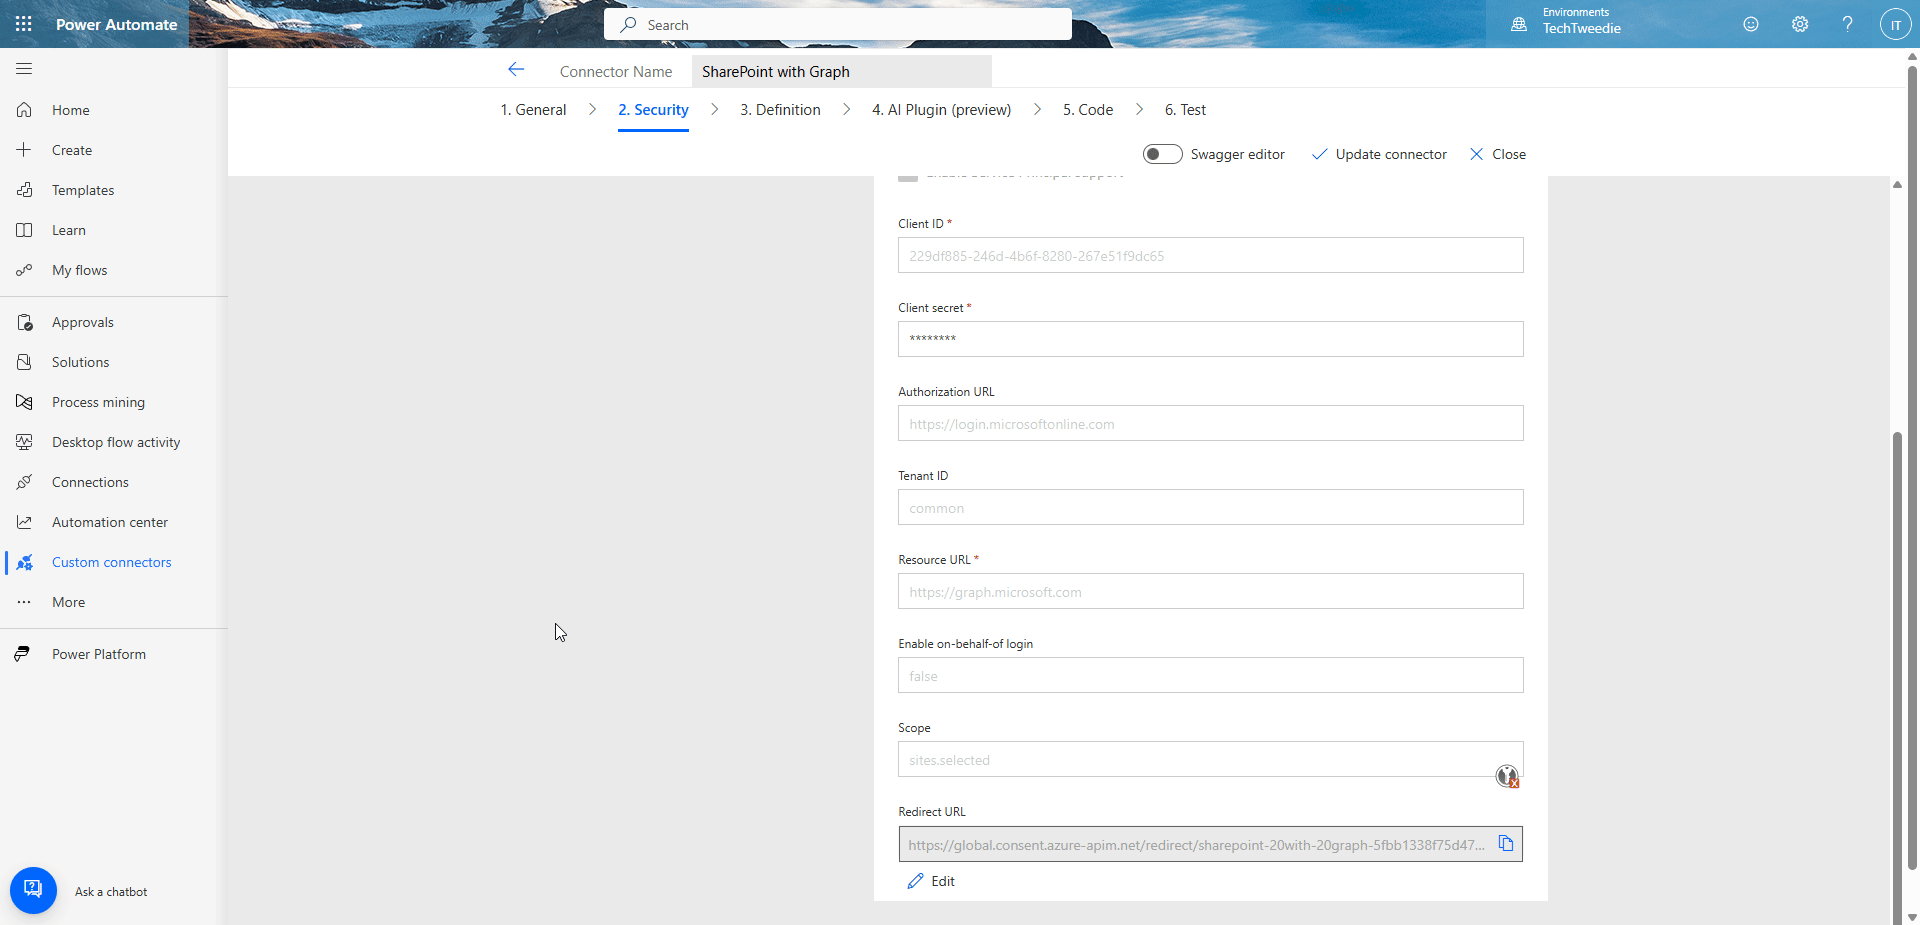
- Click on to the Security tab.
- Make sure we are using OAuth 2.0
- Make sure the Identity Provider is set to Azure Active Directory and that Enable Service Principle support is ticked.
- Click in to Client ID
- Navigate back to Entra and locate your App Registration.
- Copy the Client ID and paste it in to the Client ID box on the Custom Connector.
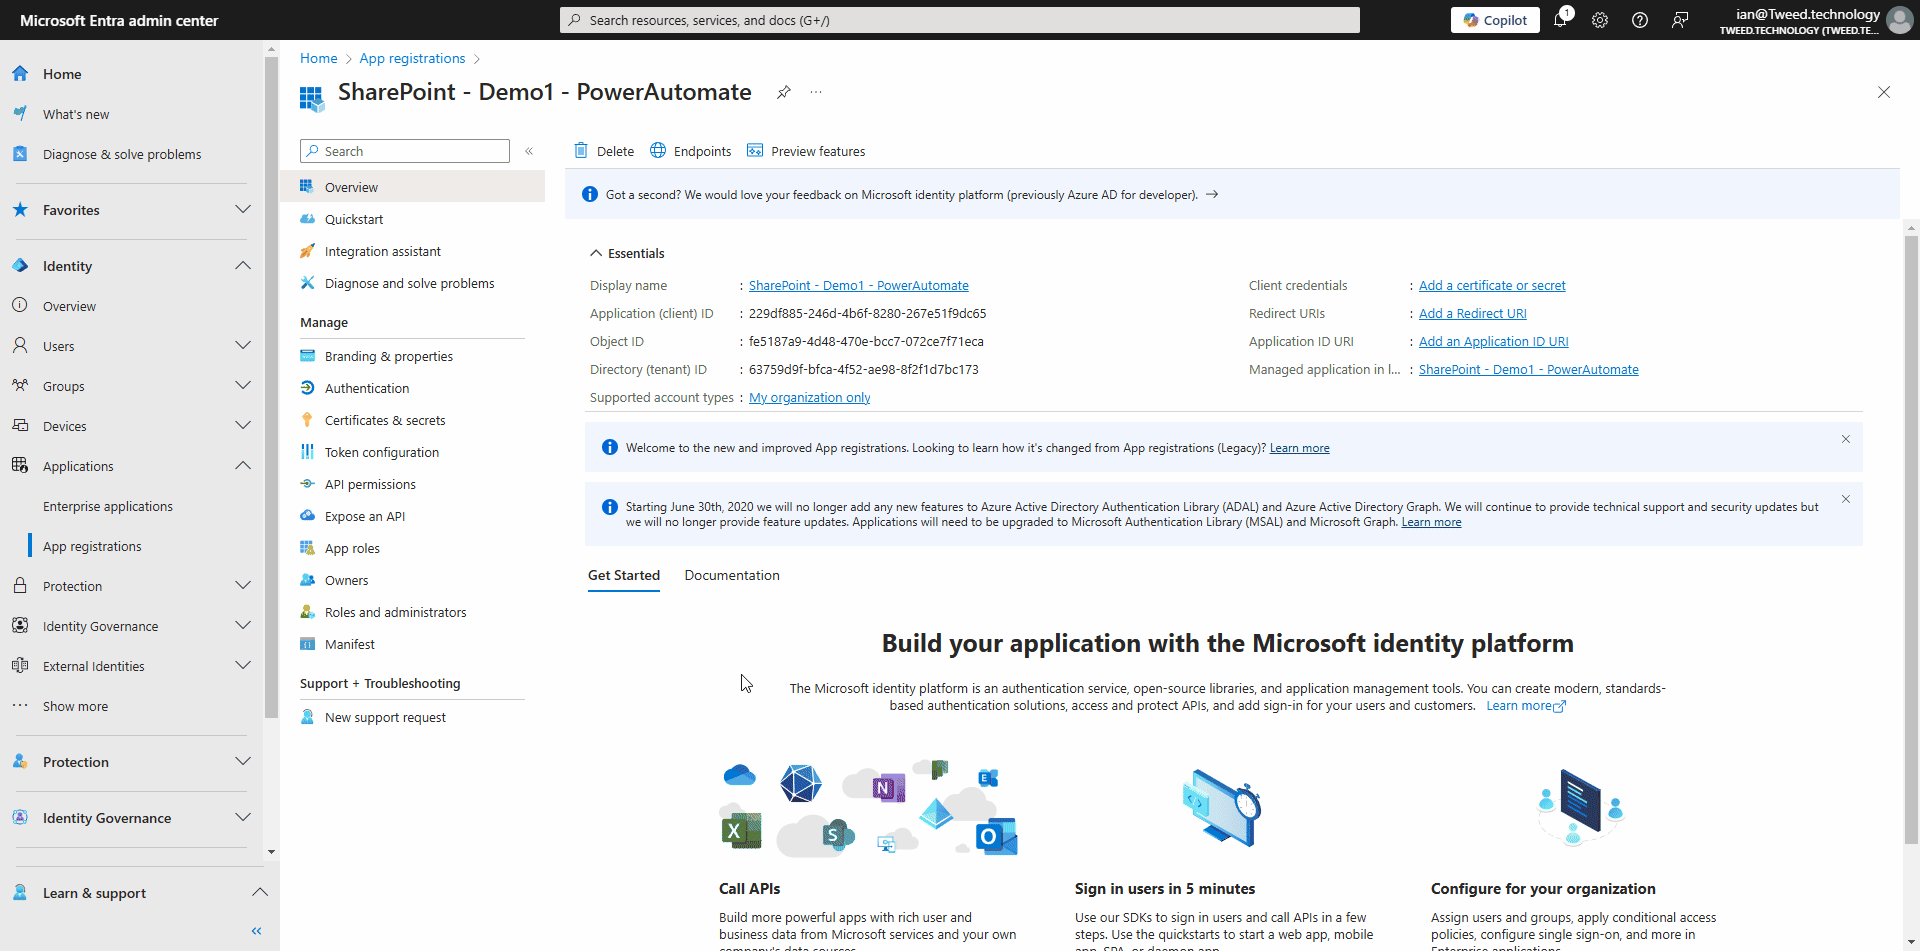
- Go back to the App Registration in Entra, and click on Certificates & secrets, then click on New client secret. Choose a name and a reasonable date for expiry that fits within your organisations policy’s.
- Copy the Secret value, NOT Secret ID, and paste it in to your connector. You will need your secret ID one more time so keep the Entra page open with it on.
- Enter in Resource URL as
https://graph.microsoft.com. - Click Create
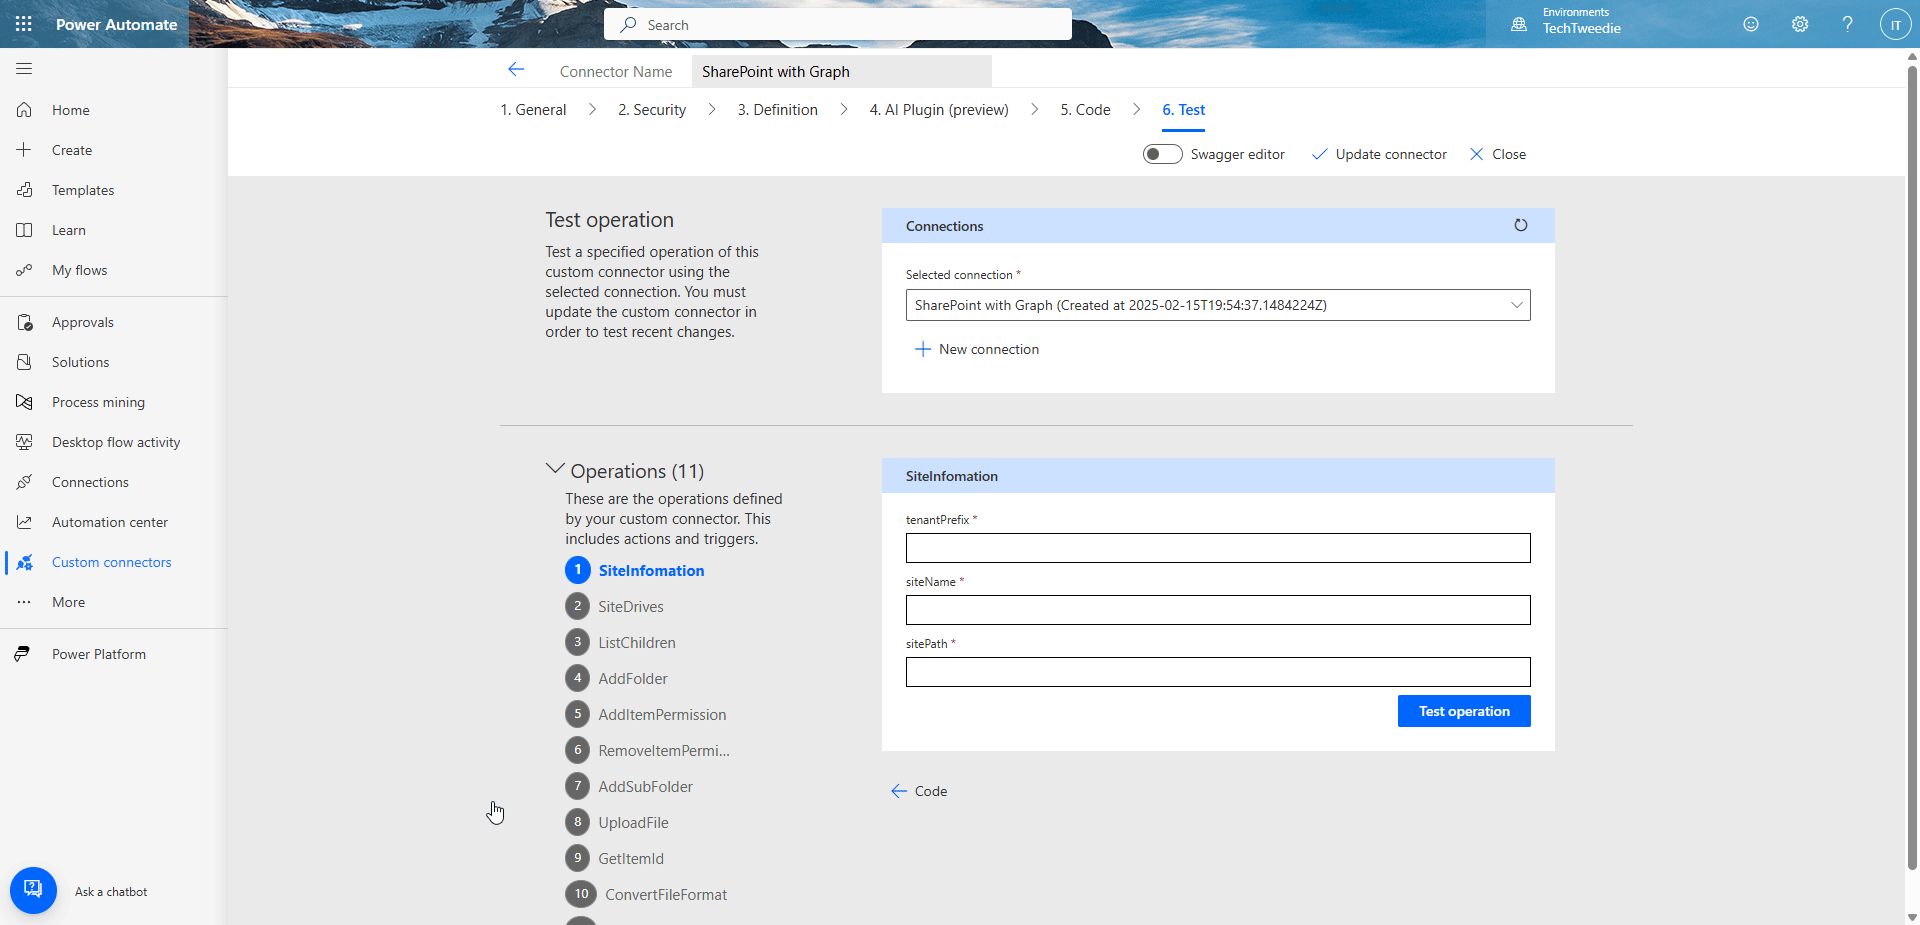
Step 5 - Add your first connection
- Click on to Test.
- Then click on to New connection.
- You should then get a screen which lets your choose Service Principle, if you don’t repeat step 3.
- Then click Create Connection.
- Enter in your Secret (we do this first as we already have the page open from Step 3).
- Then enter in your Client ID and Tenant ID.
- Then click Create Connection.
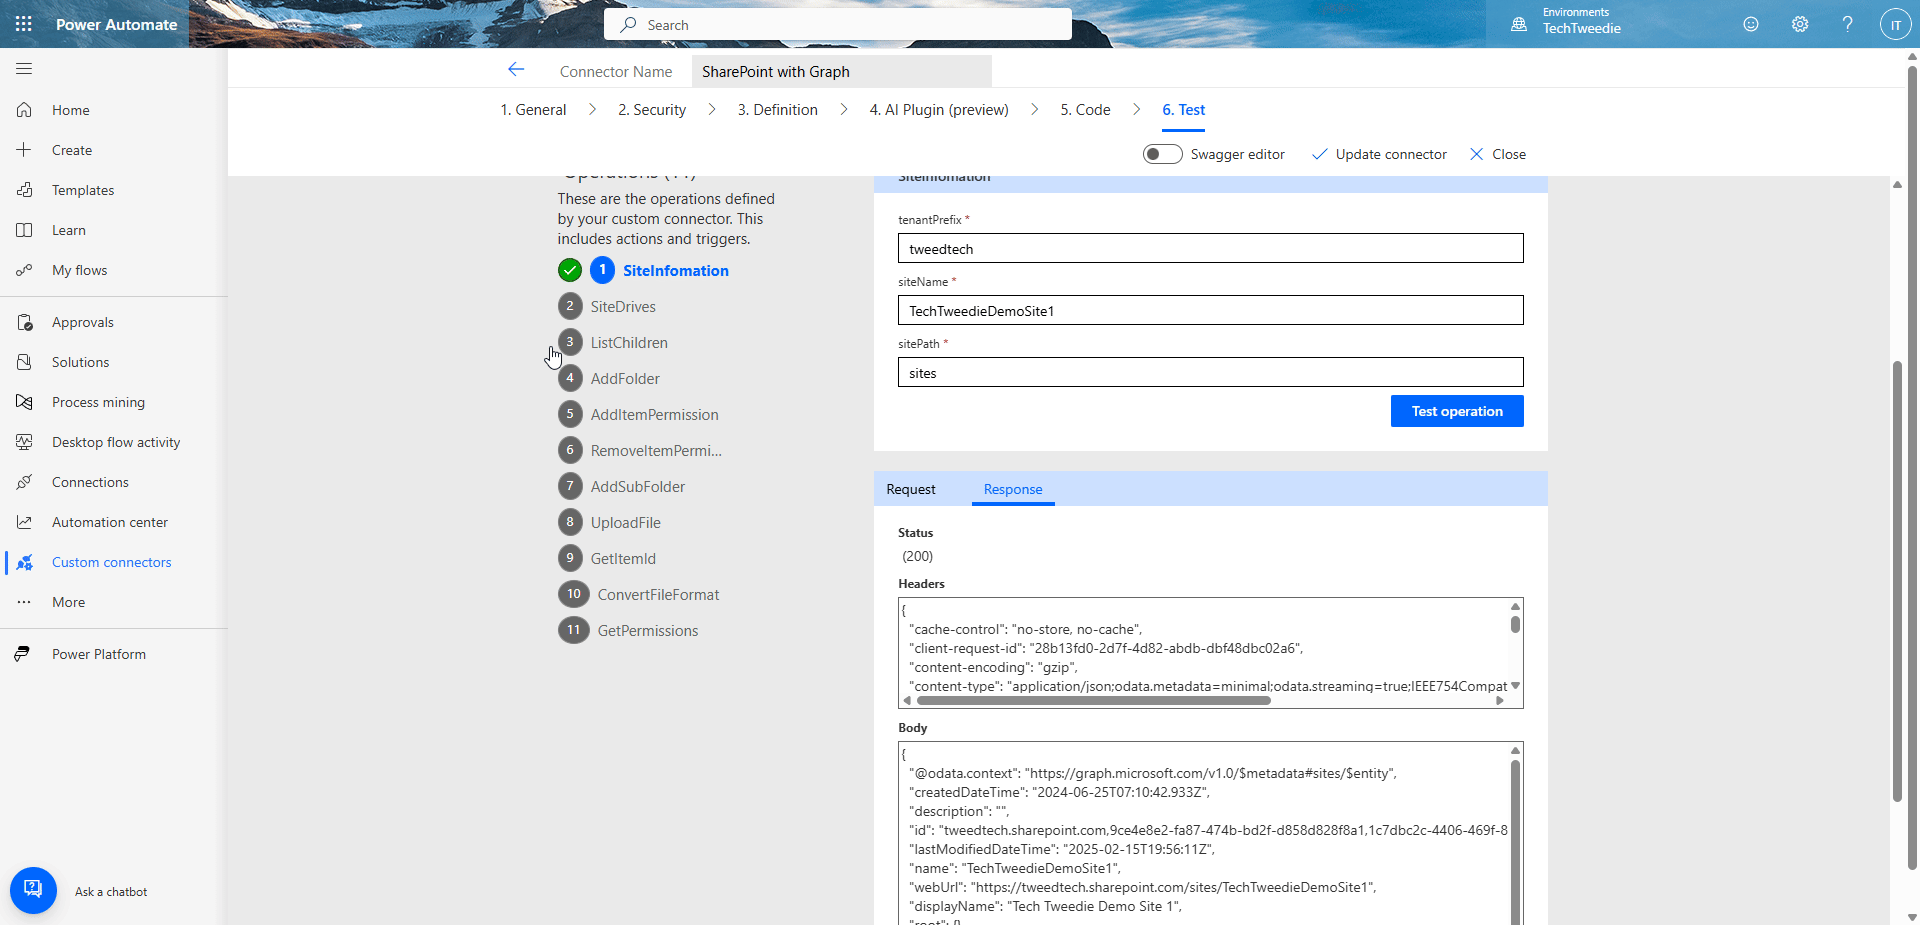
Step 6 - Test get site information
Lets see if we can connect to our SharePoint Site using out app registration.
- On the Test tab click on SiteInfomation.
- Enter in the details from your site URL. For our demo we are using
https://tweedtech.sharepoint.com/sites/TechTweedieDemoSite1/.- We will enter in the tenantPrefix, for us this is
tweedtech. - For site name we will enter in
TechTweedieDemoSite1from the url of our site. - For site path we can see from the URL this is
sites.
- We will enter in the tenantPrefix, for us this is
- Click on Test operation to see if it works.
Testing adding a permission
You can skip this part if you would like, and go to the next section.
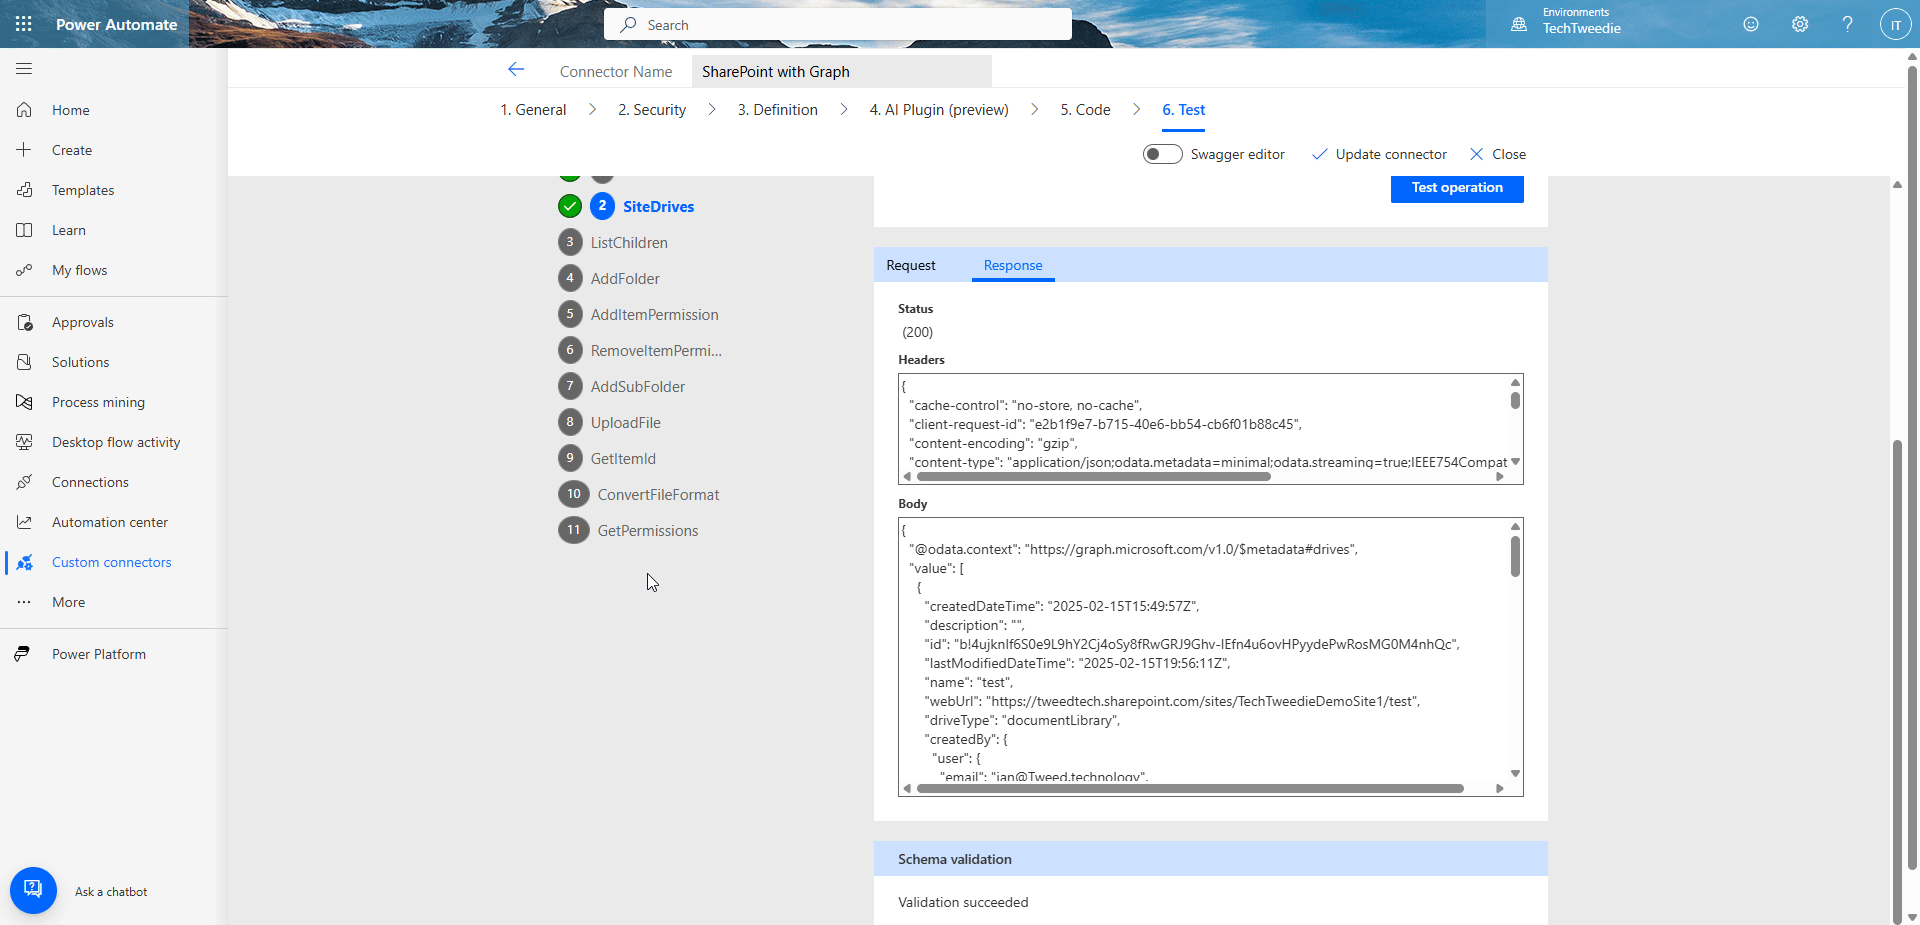
Step 1 - Test 2 to list drives
We are going to test the ability to list site drives. The site drives are the document libraries contained within a SharePoint Site, and we will need the drive ID to set permissions later.
Enter in your site id, for us this is 9ce4e8e2-fa87-474b-bd2f-d858d828f8a1 and we will get our Drive ID back which for us is b!4ujknIf6S0e9L9hY2Cj4oSy8fRwGRJ9Ghv-lEfn4u6ovHPyydePwRosMG0M4nhQc.
We can do this in Power Automate Flow later or save it as an environment variable, or hard code it depending on how we want to use it.
Step 2 - Let’s test adding a folder
So we have something to give permission for.
To do this lets;
- Click on the AddFolder action.
- Enter in siteID, for us this is
9ce4e8e2-fa87-474b-bd2f-d858d828f8a1. - Let’s enter in our driveID which is
b!4ujknIf6S0e9L9hY2Cj4oSy8fRwGRJ9Ghv-lEfn4u6ovHPyydePwRosMG0M4nhQc. - Then lets give our folder a name, we have to enter this twice.
- We have got the response back and as part of the response we have an item ID
01LDPBINVTIMOY4Y3TGRDIDMVHU4F3HIZM. - We will need the item ID to set the permissions against.
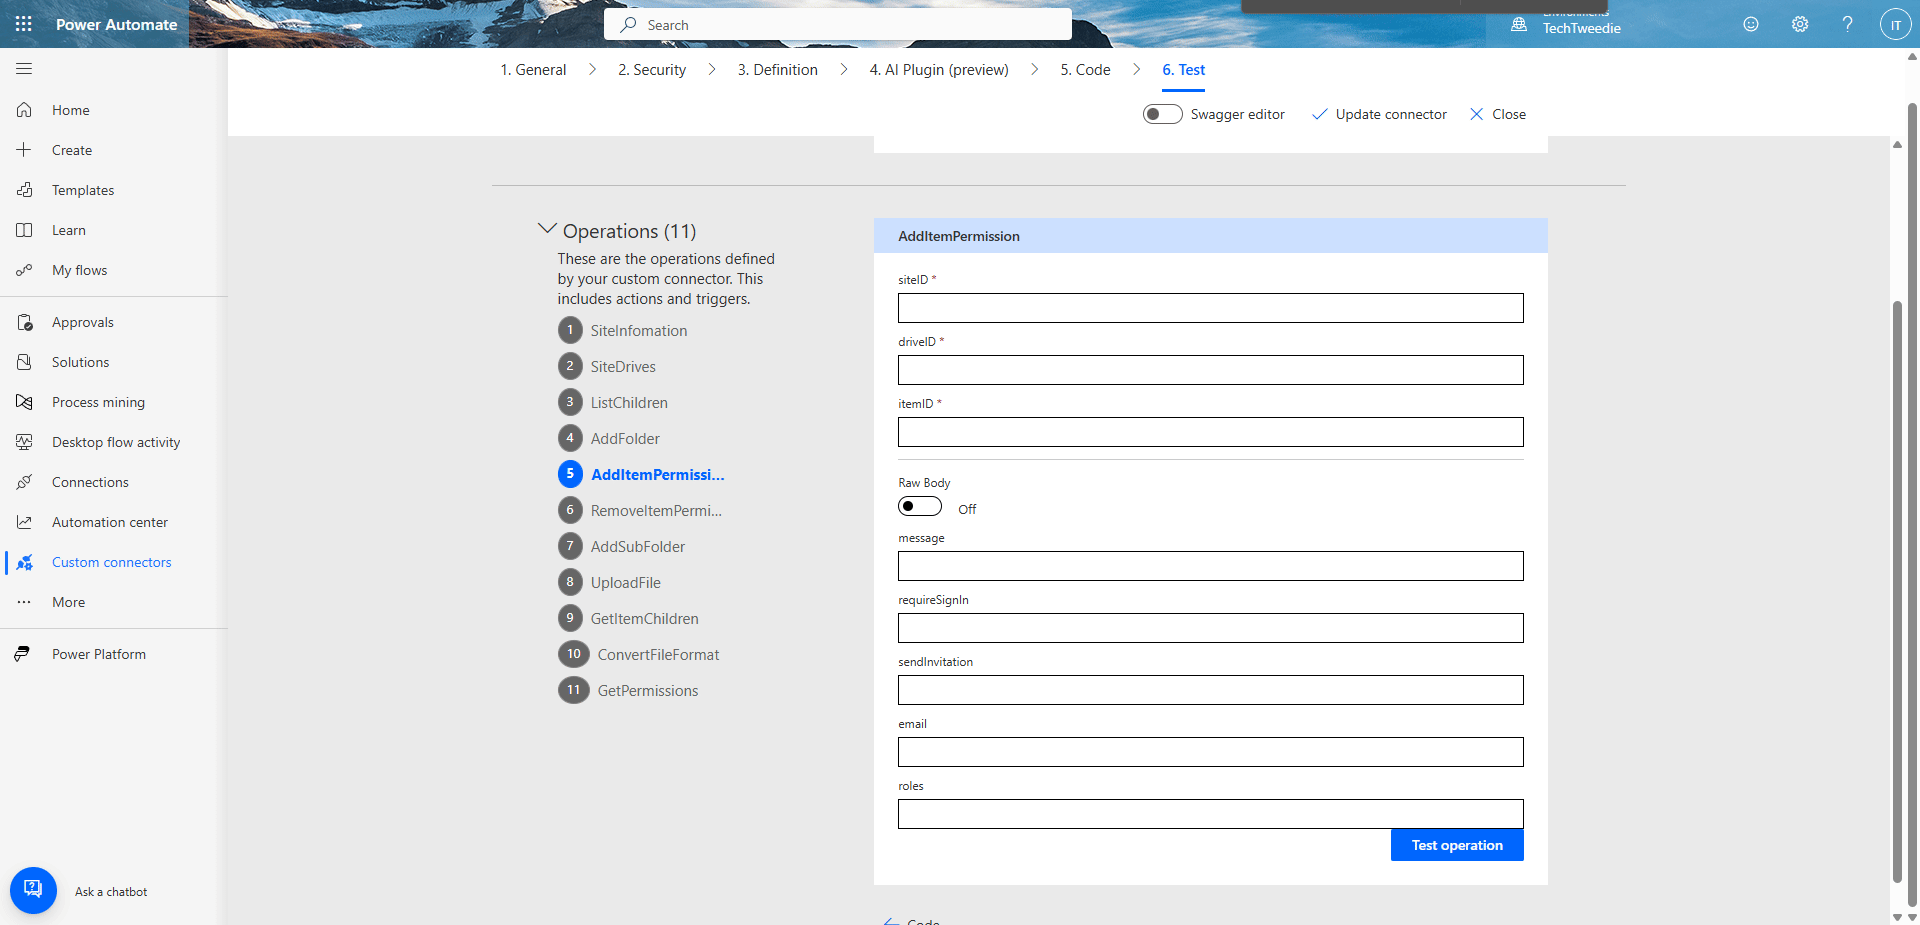
Step 3 - Let’s add the permission
We are now able to test adding the permission.
- Click on to AddItemPermission.
- Enter in siteID, for us this is
9ce4e8e2-fa87-474b-bd2f-d858d828f8a1. - Let’s enter in our driveID which is
b!4ujknIf6S0e9L9hY2Cj4oSy8fRwGRJ9Ghv-lEfn4u6ovHPyydePwRosMG0M4nhQc. - Then our itemID which we have as
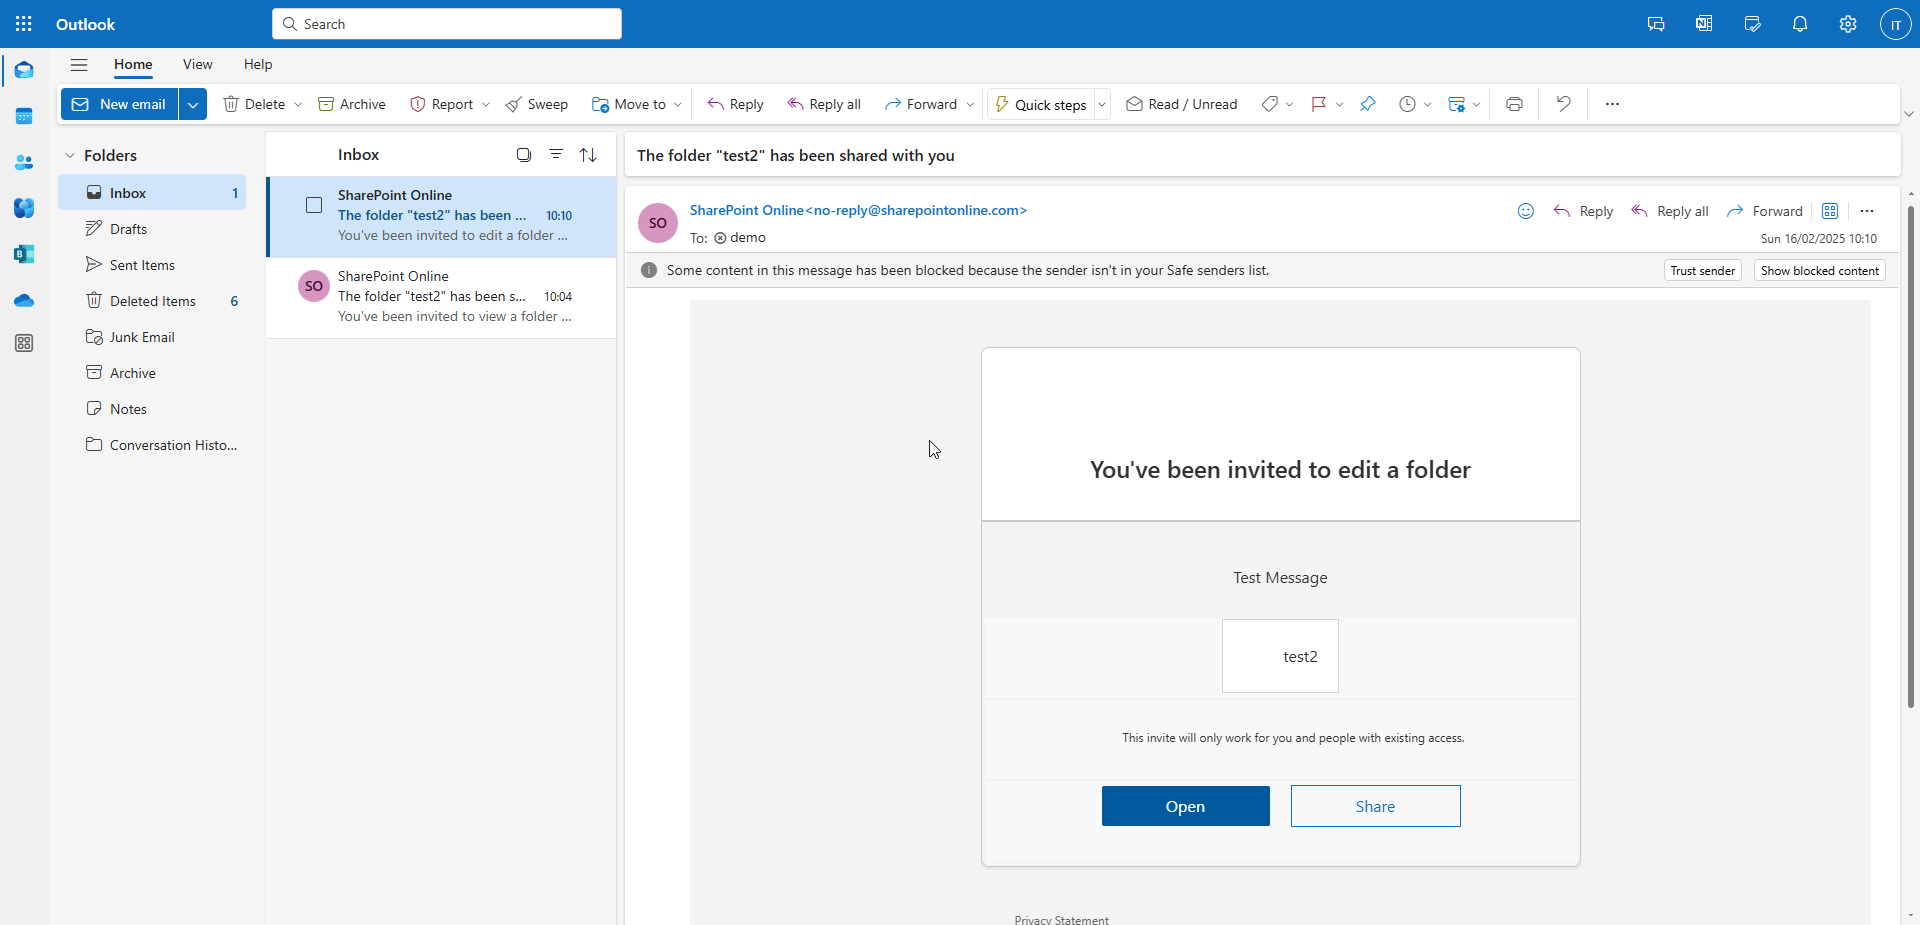
01LDPBINVTIMOY4Y3TGRDIDMVHU4F3HIZM. - Then we need add in a message. We are going to put in
Test Message. - We are going to set RequireSignIn to
true. - We are going to set sendInvitation to
true. - The email of the user we are going to invite is
demo@tweed.technology. - Add the permission we are going to give them is
read.
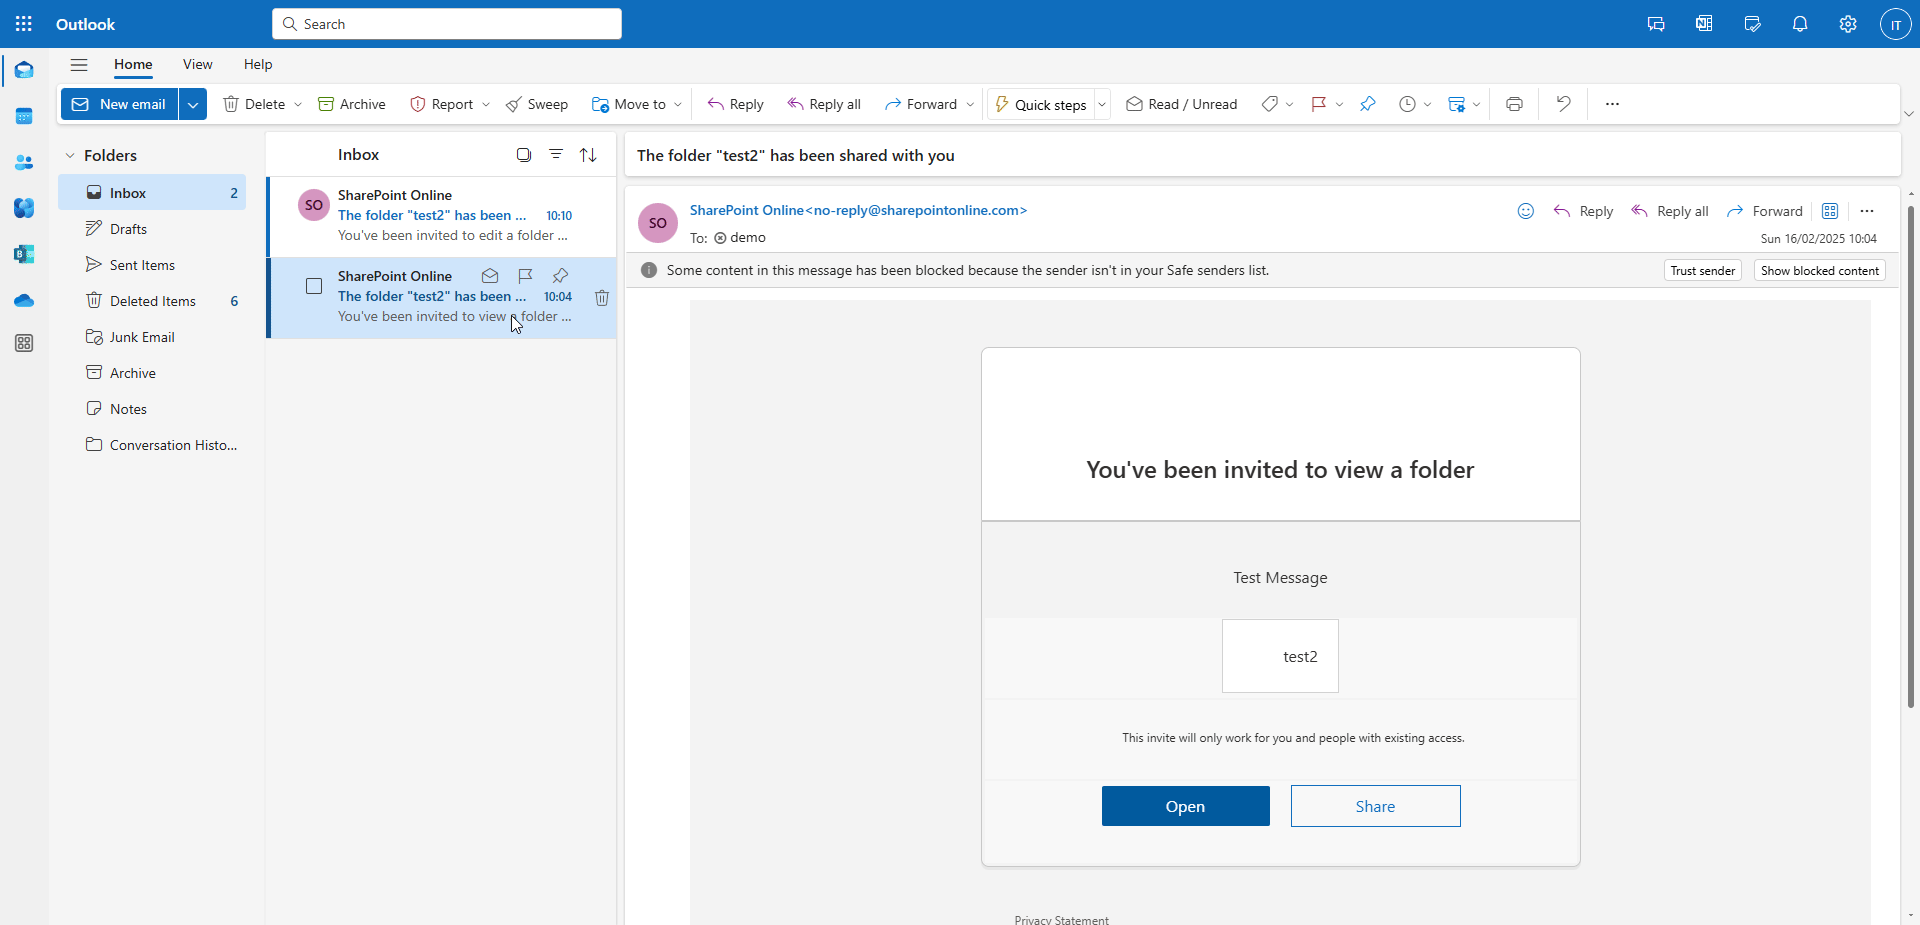
We can also see we got this through as an email message to.
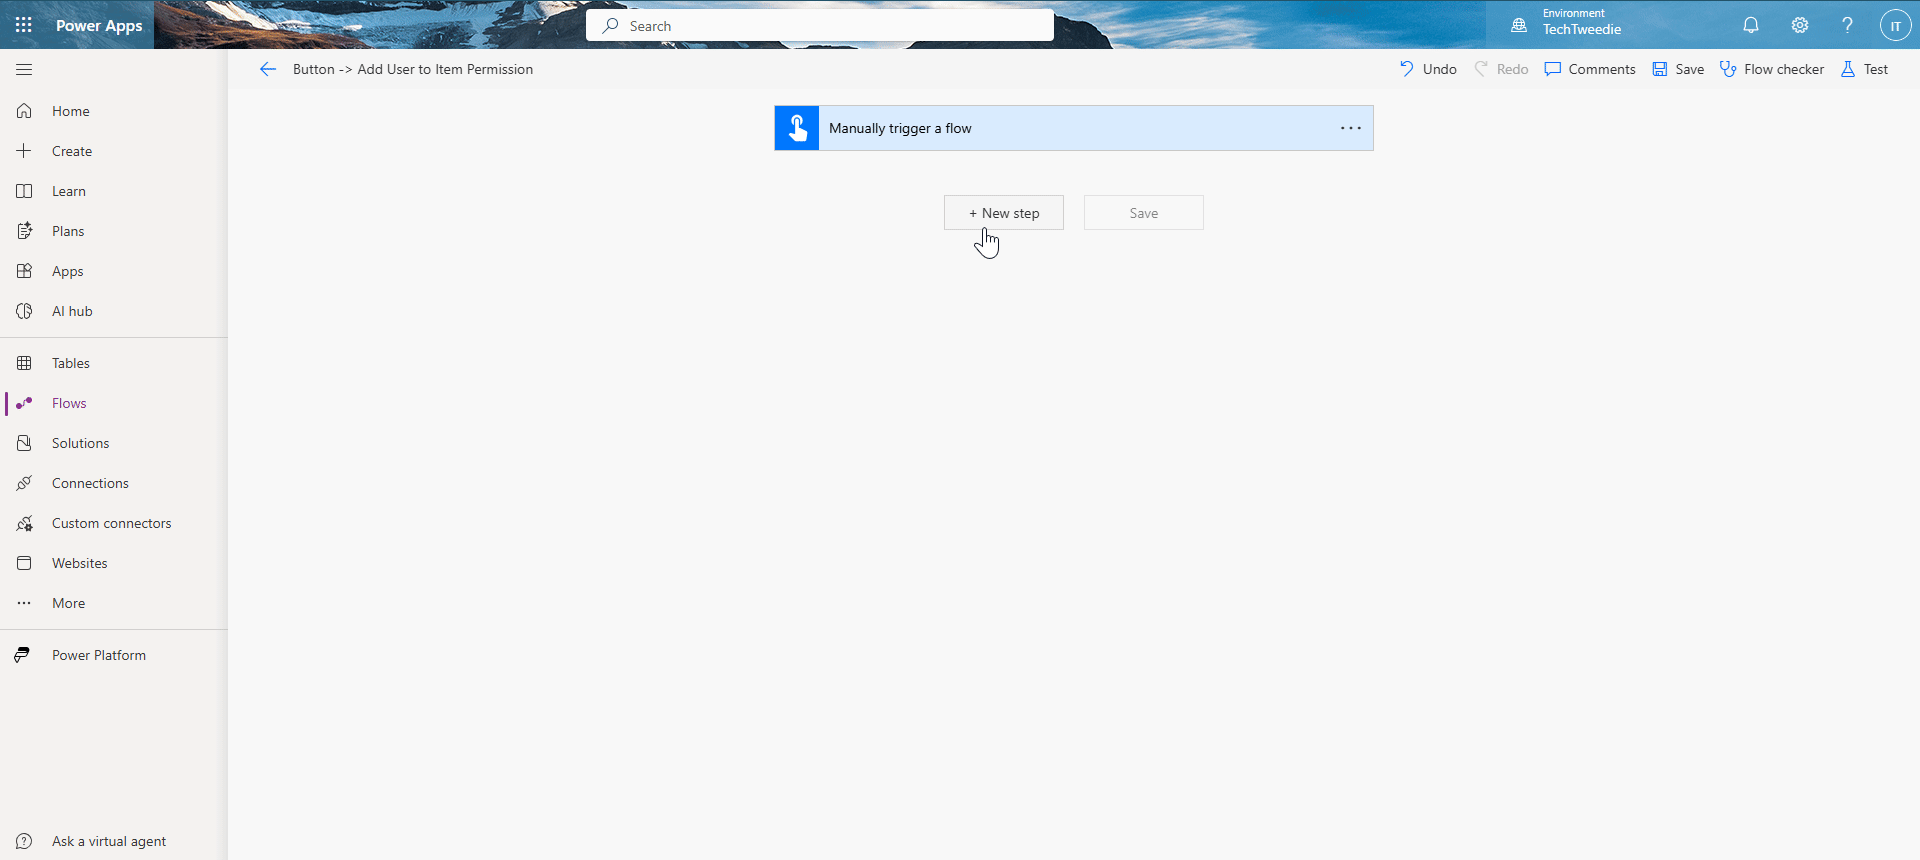
Step 4 - Lets try it in a Flow
- Click on My flows
- Create a new flow.
- Add a trigger.
- Add a new step.
- From Connector type choose Custom.
- Then select SharePoint with Graph from the list.
- Enter in siteID, for us this is
9ce4e8e2-fa87-474b-bd2f-d858d828f8a1. - Let’s enter in our driveID which is
b!4ujknIf6S0e9L9hY2Cj4oSy8fRwGRJ9Ghv-lEfn4u6ovHPyydePwRosMG0M4nhQc. - Then our itemID which we have as
01LDPBINVTIMOY4Y3TGRDIDMVHU4F3HIZM. - Then we need add in a message. We are going to put in
Test Message. - We are going to set RequireSignIn to
true. - We are going to set sendInvitation to
true. - The email of the user we are going to invite is
demo@tweed.technology. - Add the permission we are going to give them is
write. - Test and make sure the email comes through.
We can we have got an email through so our user is aware they have been given access to this folder.
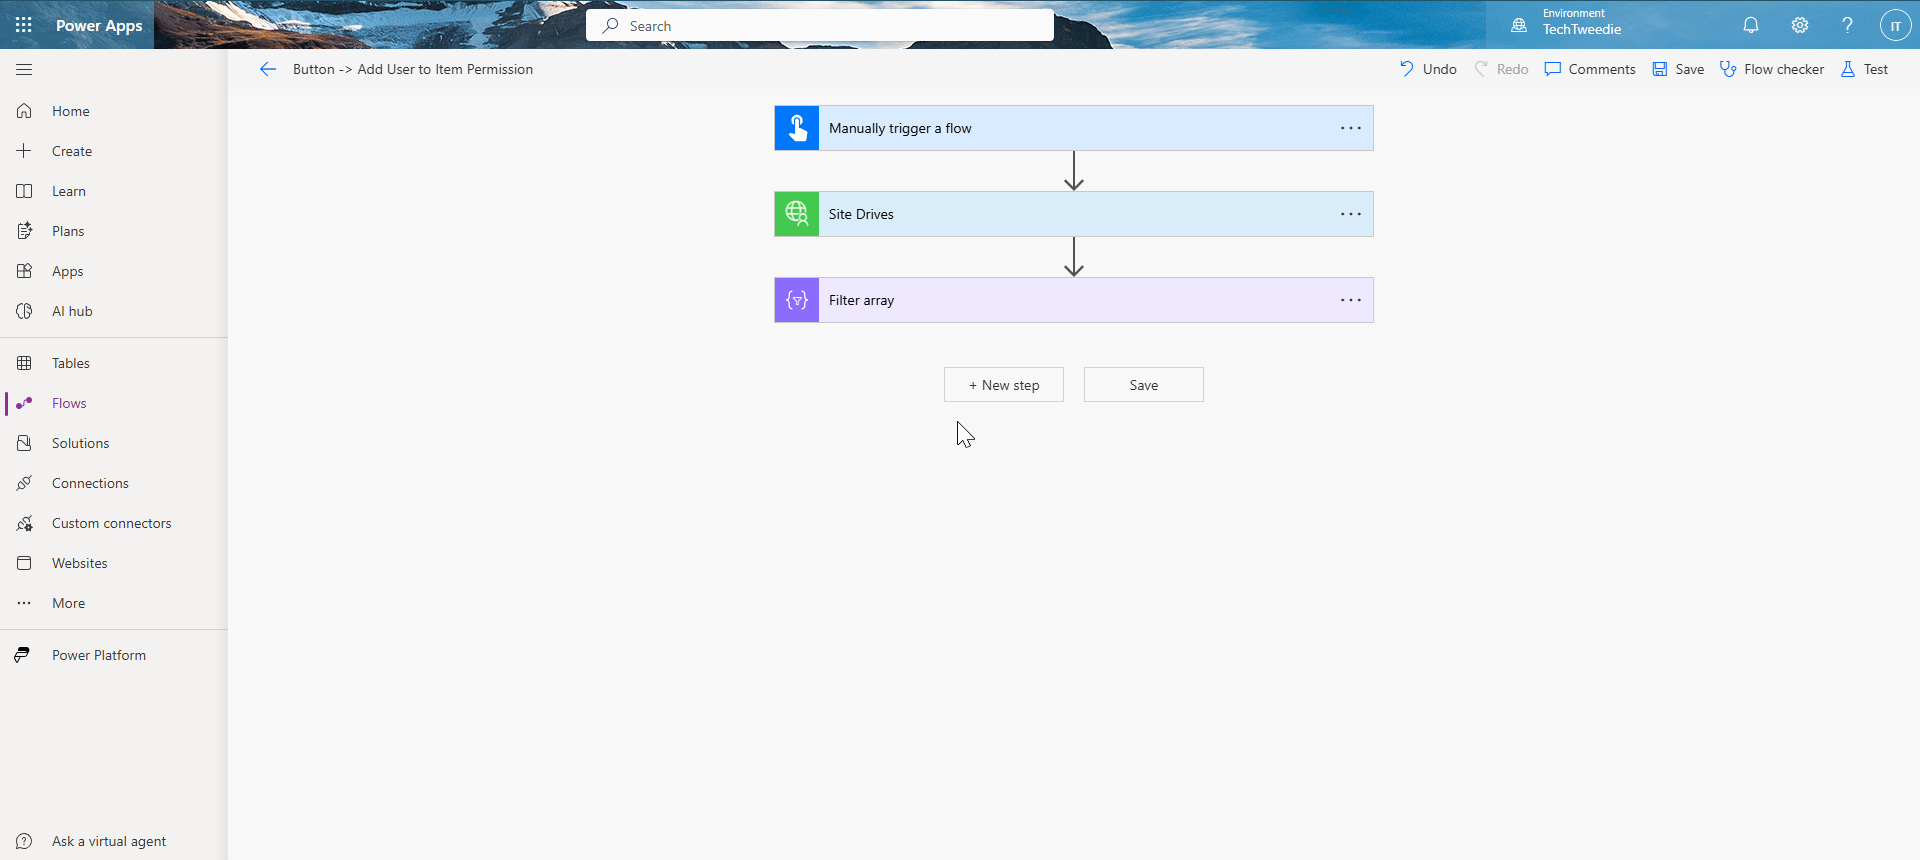
Lets Demo in a Power Automate Flow
Let’s demo is in Power Automate flow, so we can set the permissions for a folder we will create.
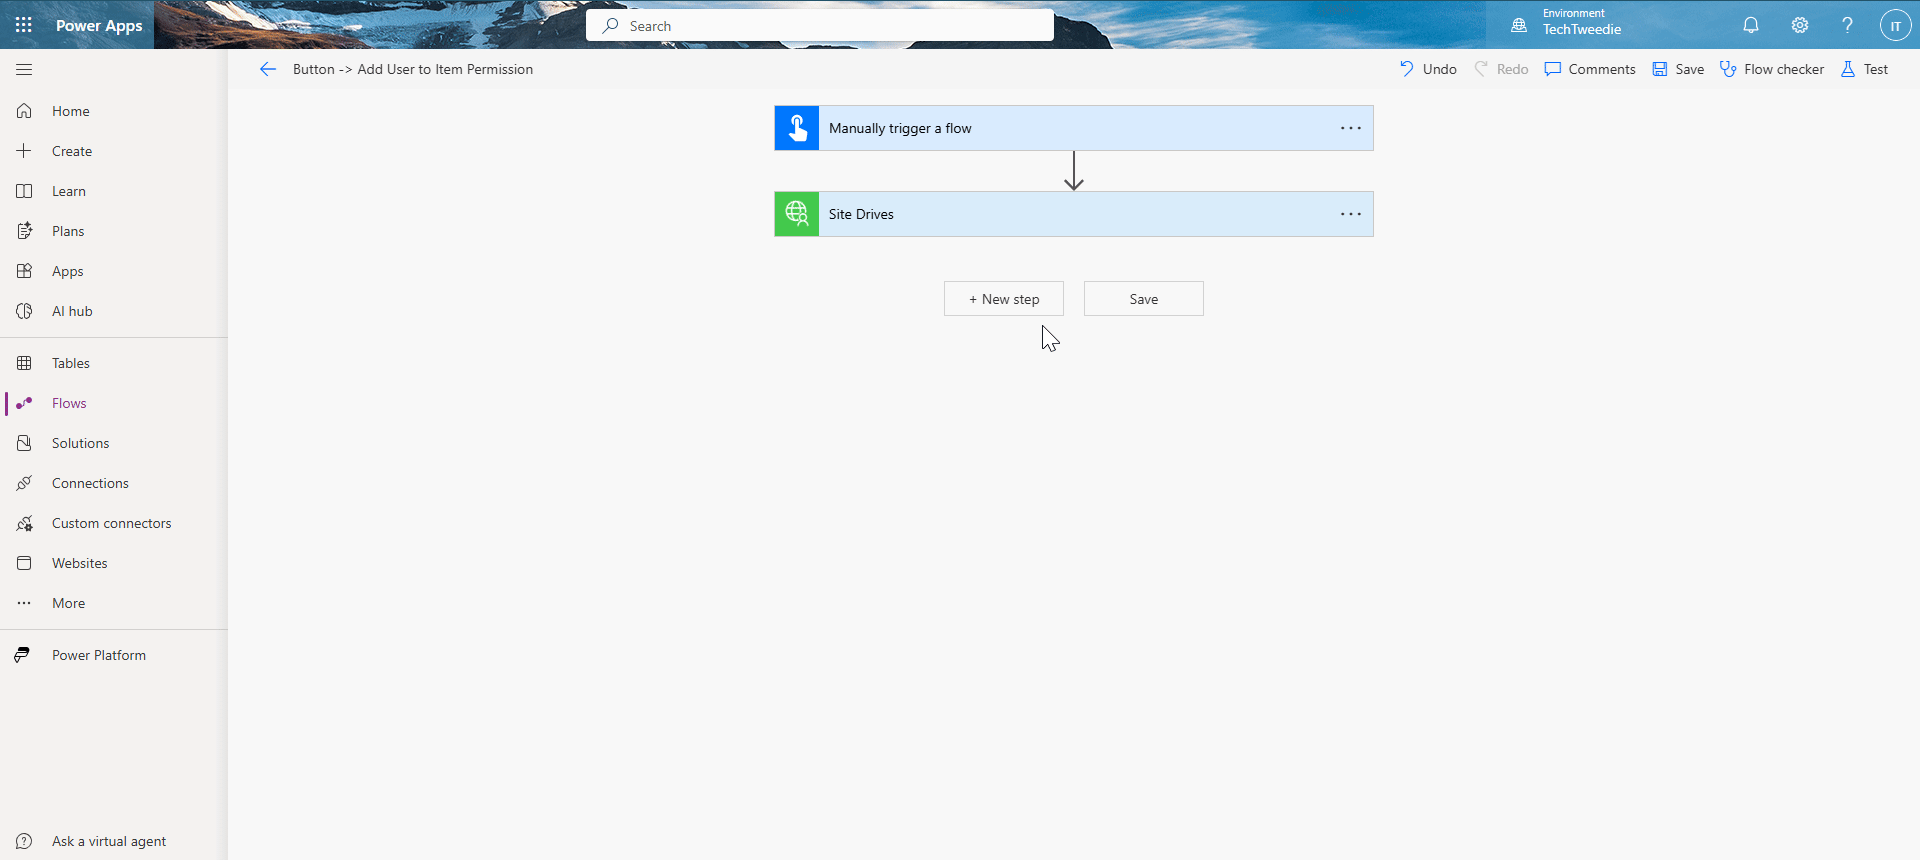
Step 1 - Start with a flow to list the drives
First we need to List the Drives in our site so we can find the right one.
- Add a new step.
- From Connector type choose Custom.
- Then select SharePoint with Graph from the list.
- Enter in siteID, for us this is
9ce4e8e2-fa87-474b-bd2f-d858d828f8a1.
Step 2 - Filter the drives we got back
Our next step is to filter the array of drive’s we got back.
- Add a new step
- Search for
filter. - Click on the data operation filter action.
- Then add the following details;
- In from select
valuefrom the Site Drves step. - In the Choose value box select
namefrom the Site Drves step. - Enter the name of your document library in our example this is a library called
test.
- In from select
- Let’s test it.
- What we get back in outputs are the details for the document library which we will use in our next step.
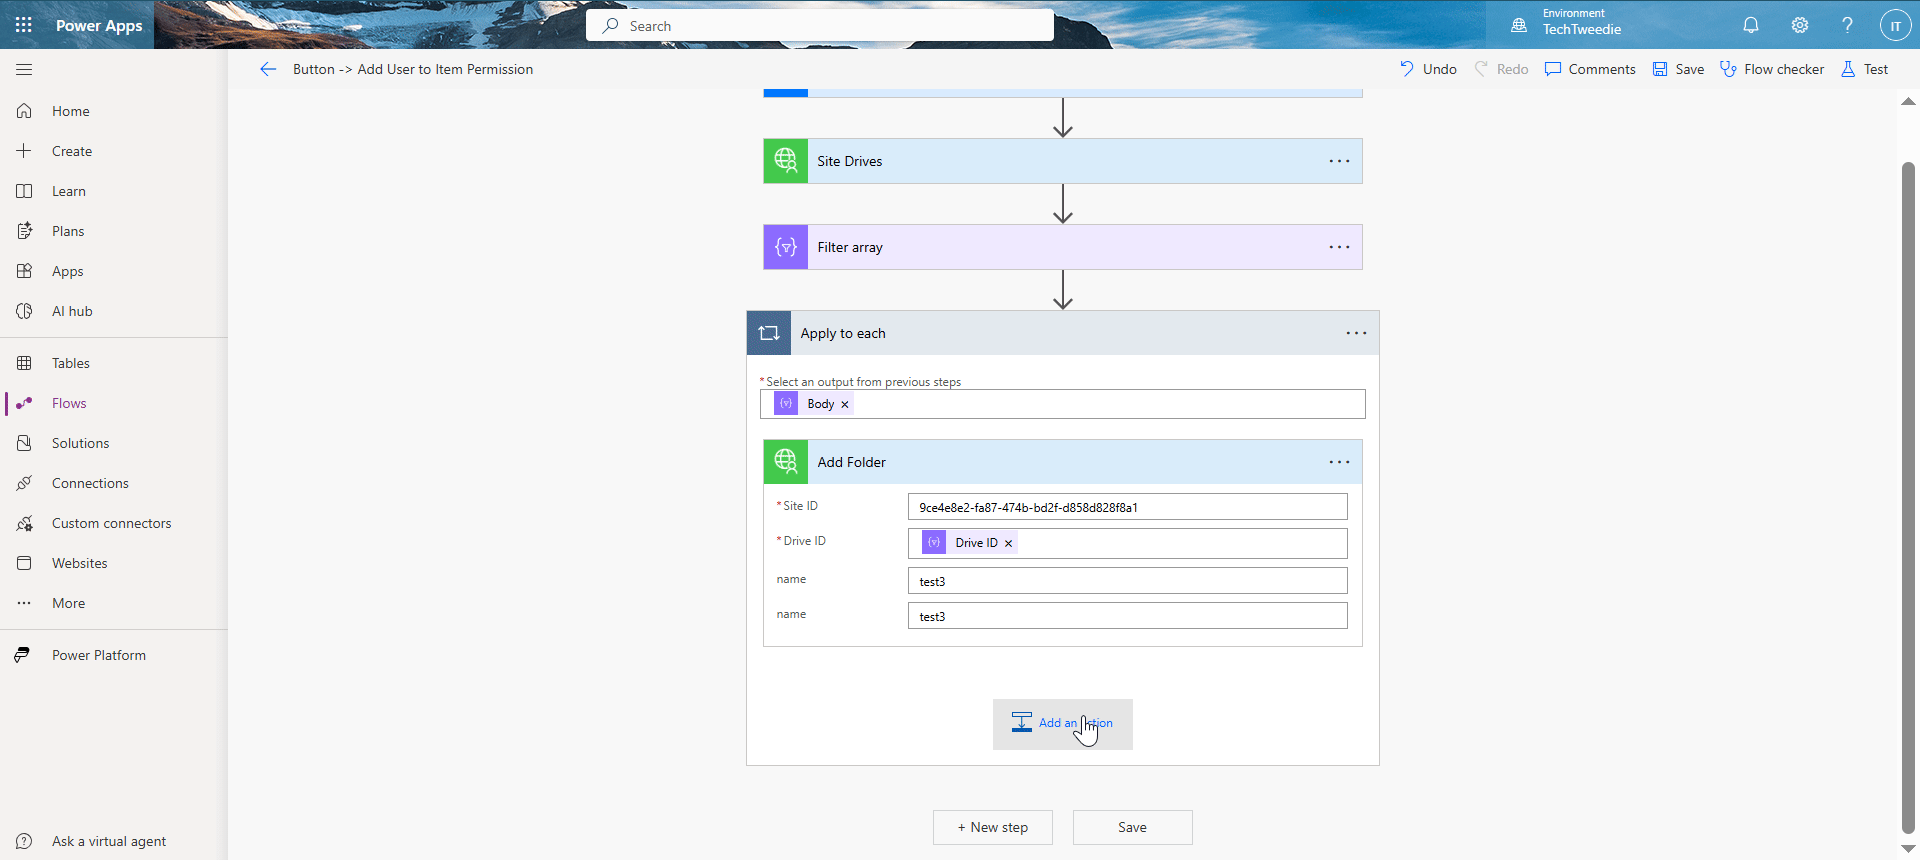
Step 3 - Let’s test adding a folder
So we have something to give permission for.
To do this lets;
- Add a new step.
- From Connector type choose Custom.
- Then select SharePoint with Graph from the list.
- Click on the Add Folder action.
- Enter in siteID, for us this is
9ce4e8e2-fa87-474b-bd2f-d858d828f8a1. - In the Drive ID add in the
idfrom the filter action. - Then lets give our folder a name, we have to enter this twice.
Step 4 - Let’s add the permission
We are now able to test adding the permission.
- Add a new step.
- From Connector type choose Custom.
- Then select SharePoint with Graph from the list.
- Click on to Add Item Permission.
- Enter in siteID, for us this is
9ce4e8e2-fa87-474b-bd2f-d858d828f8a1. - Let’s select our drive ID add in the
idfrom the filter action. - Let’s select our item ID add in the
idfrom the Add Folder action. - Then we need add in a message. We are going to put in
Test Message. - We are going to set Require Sign In to
Yes. - We are going to set Send Invitation to
Yes. - The email of the user we are going to invite is
demo@tweed.technology. - Add the permission we are going to give them is
write.
Conclusion
Congratulations! You have successfully set folder permissions in SharePoint using Power Automate Flow. By following these steps, you can streamline your workflow and ensure that the right people have the appropriate access to your SharePoint folders. This process not only saves time but also enhances the security and management of your documents. Keep exploring the capabilities of Power Automate to further optimize your SharePoint experience. Happy automating!